
How to put up an effective electric fence for livestock
Establishing a permanent electric fence system for managing livestock can cost as little as 28p a metre in materials and is extremely effective when done correctly.
Fencing expert Kim Petty, of KiwiKit recommends 10 crucial steps to take when establishing an electric fencing system.
He says mistakes are commonly made at the setting-up stage, so planning the system is crucial if it is to deliver on expectations.
See also: Guide to setting up a grazing infrastructure
1. Earthing
The most important feature of any electric fencing system is the earthing – if a fence is not correctly earthed it will be much less effective.
An animal gets an electric shock when electrons complete a circuit, travelling from the energiser, along the wires and through the animal’s body.
Those electrons then pass through the soil to the earthing system and back up to the energiser.
See also: Electric fences increase their intelligence
Correct earthing is absolutely critical – the system won’t work properly if you don’t get that right at the design stage.
Some farmers may put the earthing in an old steel barn and clamp the earth wire on a stanchion (upright) and think that will do, but it is entirely the wrong approach.
Earthing to a stanchion in a shed will mean that the electrons will struggle to find their way back to the fence and this is when you can get stray voltage in buildings around the mains unit.
If that steel barn is connected to housing or a milking parlour, livestock will feel a tingle from the stray voltage, which will cause them distress and unsettle them, impacting on productivity.
Instead, the earth should be 10-12 metres away from a building, and the scale of the earth field depends on the size of the energiser.
Some of the bigger models need up to 10 earthing rods and these must be sunk at between 1.5-2m in the ground and be set a minimum of 3m apart.
Ideally, the energiser should be as far away from the milking parlour as possible.
Locate the earth away from buildings, then have a 2.5mm insulated leadout cable running from the earth to the energiser and a similar cable from the energiser to the fence line. A good earth delivers a punch not a tickle.
2. Buy the correct energiser
A number of factors will determine what size of energiser is needed, including the length of the fence line and resistance from nettles and other undergrowth.
However well maintained a farm, it is difficult to keep fence lines completely free of vegetation on larger units.
The energiser needs to be big enough to cope with seasonal demand to ensure that the power in the line doesn’t drop below 3000 volts.
If you want to prevent stock from getting out, the power in the line needs to be maintained.
If the energiser is not big enough, or if it comes up against resistance, there is a danger that there will be a lot of earthing out and this pulls power out of the fence line.
The ideal scenario is to position the energiser in the centre of a farm, to allow the current to radiate out from that point.
It is also essential that farmers buy an energiser that can withstand future expansion.
Very few farms ever get smaller, they either stay the same size or expand, so that must be taken into account when buying an energiser. The demands on it are likely to grow as the farm gets bigger.
A farmer doesn’t want to be in a position where they have added so much wire to the original system that the energiser isn’t powerful enough.
It is always better to prepare for that and it is not much more expensive to buy a more powerful energiser.
3. Positioning the fence line
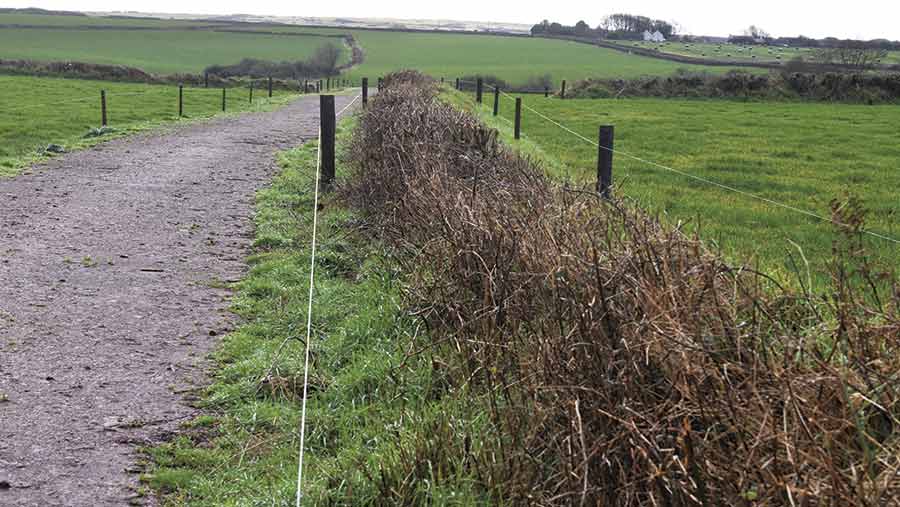
Position the line 600mm away from a hedge to allow for access by a mechanical hedge trimmer.
This distance allows room for the trimmer head to work over the fence without sacrificing the space needed for a tractor to pass through.
4. Use high-tensile wire
Use a high-tensile wire at a minimum thickness of 2.5mm. The principle is the same as that of installing a water system: on a large dairy farm, big bore water pipes are used so there is always plenty of water for the cows and, when water is carried over a long distance, it doesn’t emerge as a trickle at the end.
Electric is the same principle. If you have a powerful energiser but narrow wire carrying the current it is going to struggle to get to the far end of the farm due to the resistance.
5. Create a second wire for smaller stock
A single wire set at 900mm is adequate for larger dairy animals but, if the field needs to contain calves also, a second wire will be needed underneath.
A second wire is also beneficial on cow tracks to carry higher voltage to the far end of the farm, but this should not be set against hedgerows.
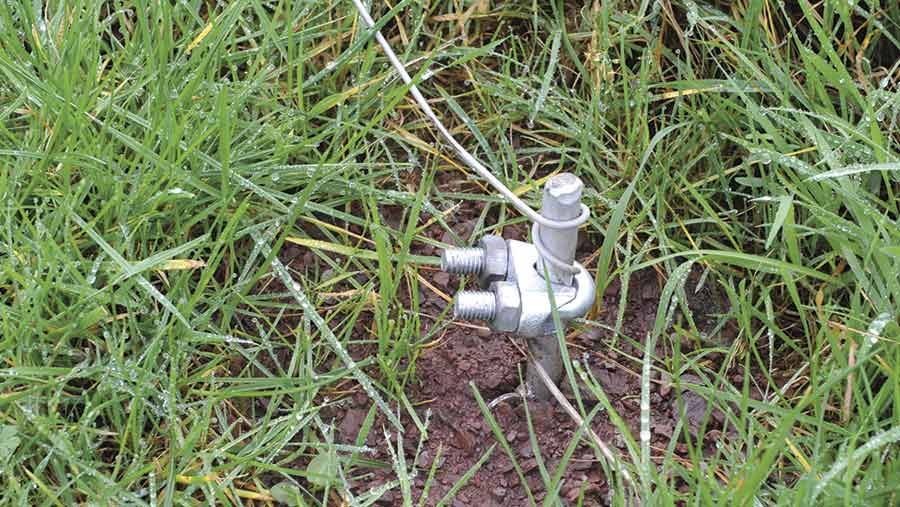
6. Gateways
Plan out underground cables so the current is secure, with no potential breaks when gates are open.
Run good quality, insulated leadout cable through a water pipe to protect it from livestock and machinery. It is important to join the leadout cable to the line with crimps to have tight joints.
Knots can be tied but wire is never strained tight enough to close the knot on most farmer-installed systems, resulting in arcing and permanent damage to galvanising on wire.
Have the hook-up for the gate wire live and the other end insulated, so when the gate is dropped to the ground it doesn’t short.
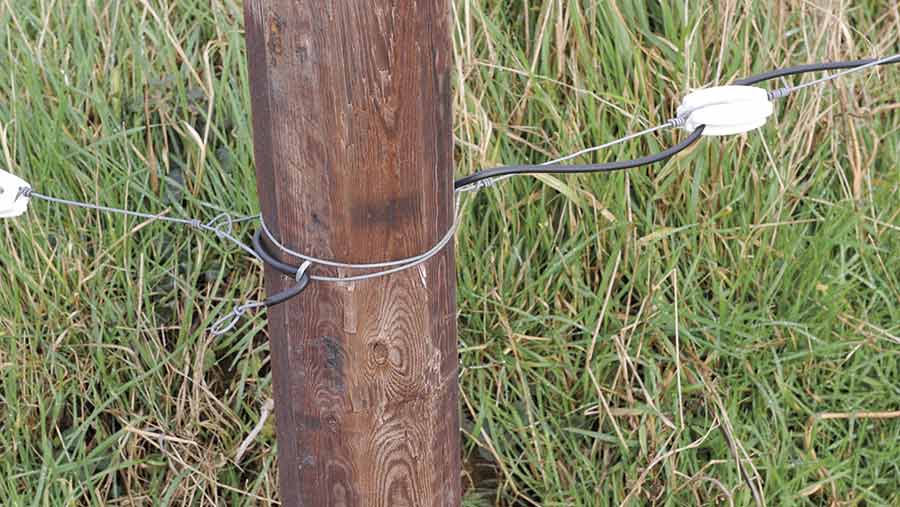
7. Create a system without loops
The system needs a spur that ends blindly so that faults can be easily detected. If fencing from a track around a field, run the fence around the field to an insulator, which acts as a dead stop or termination point.
It is the animal touching the line that creates the current; you need clear messages going back to the energiser.
Always remember that in dry conditions with dry feet there is less conduction, so a big enough output energiser is vital.
Some systems have remote control fault finders, which allows energisers to be switched off at a remote location to allow the fault to be dealt with immediately.
If you haven’t got a properly built fencing system it can confuse the energiser.
8. Avoid telecommunication lines
An electric fence can cause problems with a telephone line or internet connection, so avoid running it parallel with that wire but it can be run across a line.
9. Avoid electric fencing silage fields
If a field is used for making silage regularly, electric fencing should perhaps be avoided because the grass will grow over wire, causing shorts in the circuit and requiring maintenance to clear it.
Cut-out switches to isolate lines can be used in this situation.
Sometimes it is appropriate to just fence one boundary to provide power for sub-division for future grazing
10. Maintenance equipment
Equip yourself with the necessary tools, such as brushwood cutters. Under wire spraying is not always the answer because this can encourage the growth of nettles.
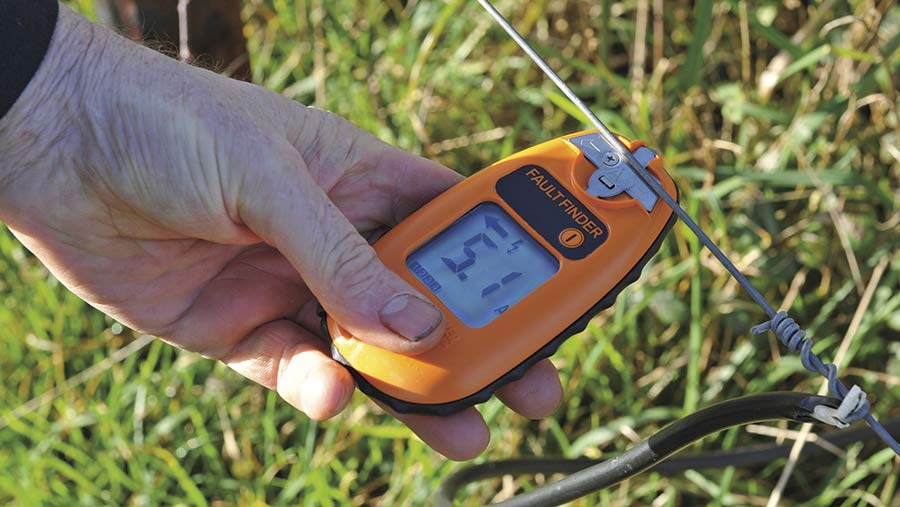
A fault finder is a vital piece of equipment and should be used by the person that tends the stock daily, so that any change in the voltage or increase in the amperage can be spotted immediately.
Very often, the cause will be a fallen branch or broken insulator, which can be easily remedied. Maintaining a high voltage prolongs the life of fixed and temporary fencing.