
Turkey tips: How to get the best results with your poults
Getting poults off to a flying start requires careful planning and a watchful eye. Paul Kelly, managing director of Farmgate Hatcheries, explains.
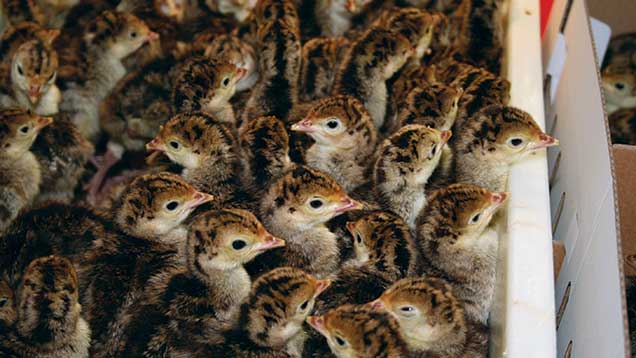
Brooding turkey poults is like a disaster waiting to happen; given half a chance, the new arrivals will find a way to die.
As such, getting the brooding conditions spot on will have a big impact on your results. Assuming you’re using traditional ring brooding – not whole house brooding – this is the advice we’ve honed over the years for our staff and our customers.
Preparing the ring
Prepare the ring and light the brooder at least six hours before the poults arrive. The temperature under the brooder should be correct and steady, at 35-37C, and the house temperature should be about 25C.
Use a wire-netting ring if the house is draught-proof; if not, choose a solid ring. The ring should ideally be 3.5m (12ft) across with a maximum of 400 poults per ring.
See also: Traditional turkey poults cheaper in 2015
Clean soft wood chips are ideal for bedding, about 5cm (2in) deep and trodden flat, though shredded paper and peat moss are common alternatives. Long or chopped straw may also be used, but must be dust free to guard against aspergilla.
Provide plenty of food and water points – eight of each for 400 poults, placed alternately 50cm (20in) outside the rim of the brooder. Apple or egg trays and jam jar drinkers are suitable.

© Fuse/ Getty
Good light intensity is also essential so the poults can find the food and water. If in doubt, add two extra 100W bulbs 50cm (20in) above the ring, and give 23 hours light each day for the first seven days. Remove the extra lights if poults show any signs of vent or wing pecking.
As soon as the poults arrive, place them immediately under the brooder. The sooner they have the opportunity to find warmth, feed and water, the lower will be their mortality.
Daily routine
It is important to establish a daily routine, with feed and water provided to the poults at 8am, 3pm and again at 10pm. Any drinker that is less than a quarter full needs to be cleaned and refilled.
When topping up feed, tip two feed trays into one, and pick off all hard lumps of droppings, then put new feed on the empty trays.
It’s always good to spend a few minutes just looking at the poults. This way, you’ll learn from their behaviour and know better how to look after their needs.
The poults feed off the yolk, absorbed at hatch time, so even if they do not find food or water, they will live for four to five days. A few deaths at this “starve out” time are normal, but even these may be reduced with Farmgate’s Poult Saver Kit, which is a mixture of vitamins, minerals and electrolites.
Normal mortality is 2% to seven days, and 3% to 14 days. But poor ring layout or brooder management can easily lead to 5% mortality in the first six days.
Second week
It is best to introduce any automatic drinkers or tube feeders gradually in the period from five to 12 days, so that there are no sudden changes. Do not remove the starter feeders until 14 days.
When the ring is dismantled and the poults have got used to the whole pen, start withdrawing the extra feed trays, the small drinkers and the extra light bulbs. Four drinkers and four feeders (for 400 poults) should be left to provide a continuous supply of feed and water.
Then, from seven to 14 days, reduce the light period gradually from the initial 23 hours to natural day length.
The brooder temperature should be reduced after the first week by about 5C a week for the next few weeks into the summer. The brooder can be removed altogether once the house temperature exceeds 15C.
After the first 12 days management is much simpler, but the formula for success is still the same — tender, loving care.
Do’s and don’ts for successful brooding
DO
- Have lots of feeding and drinking points – you really can’t have enough
- Ensure the feeding and drinking points are low enough and easily accessible
- Take time to look at poult behaviour – it tells you everything you need to know
- Check if they are huddling, which means they are too cold
- Check if they are panting and trying to get away from the heat source – they are too hot
- Listen to the noise they are making. If they are noisy, they are stressed
- Provide plenty of fresh air, fresh food and fresh water – all in a comfortable temperature
DON’T
- Tread on them
- Ignore them when they’re making lots of noise. Everything may look all right, but actually they are crying for help and something is wrong
- Assume they travel to find food and water – it has to be in front of them all the time
- Allow big swings in temperature. On hot days turn the brooders off rather than overheat the poults