
Step-by-step guide to avoiding losses at calving
 © Kathy Horniblow
 Calving a cow may seem second nature to most stockmen, but taking a step back and thinking about how you intervene could help prevent unnecessary losses.
Eight percent of dairy calves are born dead or die within 24 hours. That’s according to a trial carried out on 19 farms by the Royal Veterinary College between August 2003 and October 2004.
For beef, figures from AHDB Beef and Lamb’s Stocktake show 3% of suckler calves were born dead on farms in the production years ending between April 2014 and March 2015.
See also: Vet Q&A: How to tackle calf scours
But with 90% of calves that die in the perinatal period alive at the start of calving, dairy research carried out at Moorepark suggests many of these losses could be prevented through management.
Vet Lucy Hepworth, from Friars Moor Vets, says the main reasons deaths occur around calving are due to calves being deprived of oxygen as a result of cows or heifers not being assisted at the right time, or calves being handled inappropriately.
Oxygen-deprived calves will become metabolically acidotic, making them weaker and less able to absorb colostrum, leading to a higher chance of scours and pneumonia.
Intervening at the wrong time or in an incorrect way can also lead to greater risk of downer cows and cervical or vaginal tears, potentially leading to infection and reduced fertility.
To maximise the chance of a successful calving, Mrs Hepworth provides the following guide.
A recap on the three stages of normal calving:
- Stage one (takes six to 12 hours): Udder looks tight, teats are waxy and the vulva is red. Ligaments on either side of the tail head relax, the cervix starts to dilate, the cow looks restless and the first water bag comes through.
- Stage two (takes 30 minutes to four hours): Marked by the appearance of two feet within the second water bag. At this stage the cow starts to push, encouraging the cervix to fully dilate.
(Note: Heifers should be given extra time for stage one and two.)
- Stage three (within 24 hours): Placenta is passed.
When to check an animal
Animals should be observed at least every three hours in stage one. Once stage two has started, allow the cow to push and take short breaks for up to two hours. Intervene in the birth process when the feet of the fetus have been visible for two hours (two feet/two hours rule).
Check the animal
- If stage one doesn’t progress to stage two within eight to 12 hours.
- If the cow is continually pushing without delivering calf – check after 30 minutes.
- If the cow stops pushing or doesn’t push once in stage two.
- If there are obvious issues – for example, big feet, coming backwards, or head only.
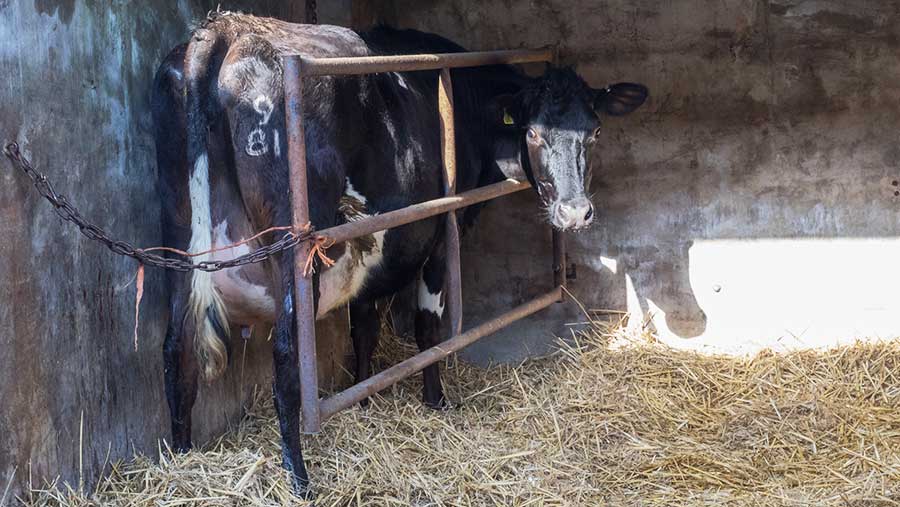
1. Secure the animal
© Kathy Horniblow
Position the cow safely in a locking yolk or behind a secured gate in the calving yard. Avoid using a crush unless it has open sides, because if an animal goes down, it must be easy to release them. Ensure enough space behind so a calving jack can be used.
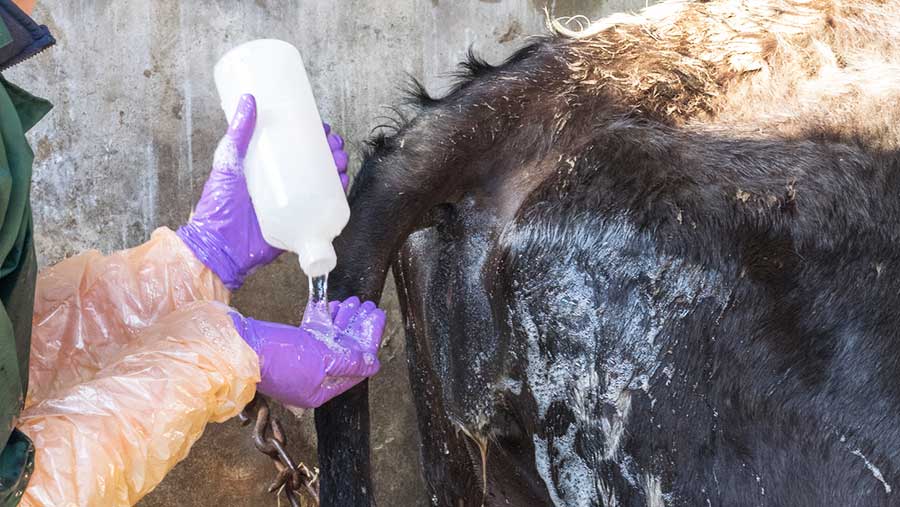
2. Assess calf position and size
To minimise the risk of infection, wash hands with antiseptic or use gloves. Clean the cow’s vulva with antiseptic and, using lubrication, assess the position and size of calf and if the cervix is fully dilated.
If you can feel a thick ring within the birth canal, which you have to put your arm through to feel the calf, then the cervix is not fully dilated. If the cervix is fully dilated, you will not be able to feel it. If necessary, and possible, correct calf’s position.
© Kathy Horniblow
Tips:
- If the calf’s head and feet move in and out as the cow pushes, the head and shoulders are in the pelvic canal, and you can pass your hands around the calf, you should be able to calve her yourself.
Do not intervene if the cervix is not fully dilated. Depending on individual cases, leave longer for dilation to occur (especially in heifers) or call the vet.
Vet assistance may be needed if:
- You can’t correct the calf’s position within 10 minutes of trying
- You suspect a twisted uterus (birth canal feels like a corkscrew)
- The calf is too big – indicated by the calf’s feet not moving – the feet are crossed or you can feel the feet, but the head is not in the pelvic canal.
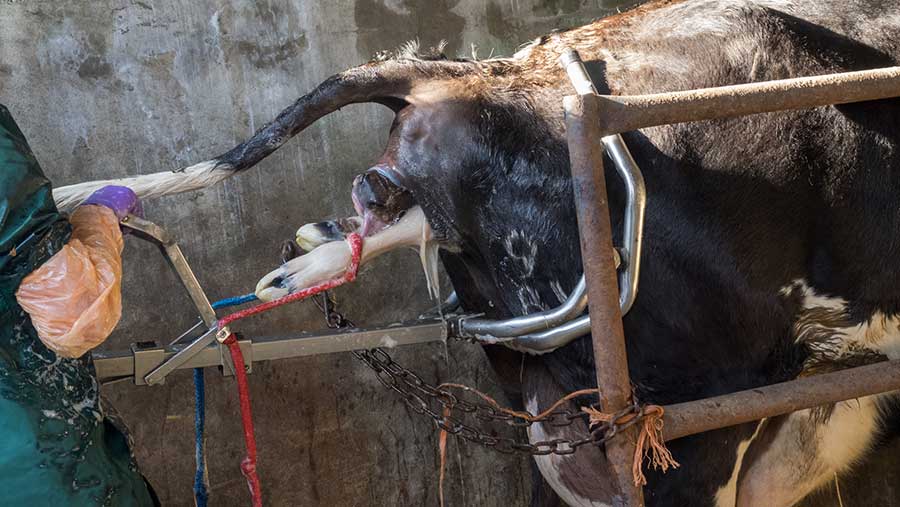
3. Position the calving ropes
Place the ropes around the feet, above the fetlocks. To minimise trauma, try to pull the calf by hand before using the jack.

© Kathy Horniblow
4. Use the calving jack
If you don’t make progress by hand, use a calving jack. Work with the cow and use traction as she pushes – don’t ratchet continuously – and be patient.
Start with holding the jack straight, parallel to the cow’s spine. Once the calf’s chest is out, drop it down to 45deg.
Tips:
- If the calf is backwards, position the jack higher, above the spine, and drop down to the parallel angle once the chest is out.
- If you can’t get the calf out within 15 minutes, you notice bleeding or calf abnormalities, call the vet.
© Kathy Horniblow
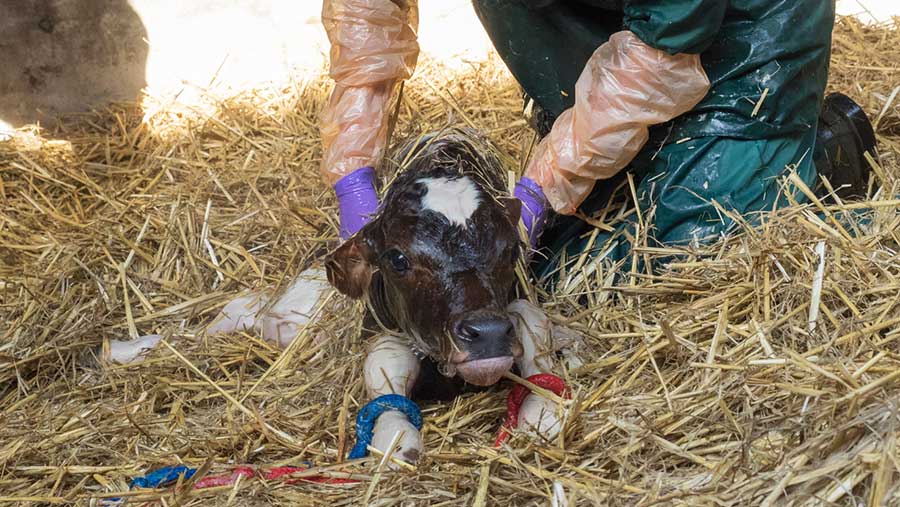
5. Resuscitate the calf
To stimulate breathing, scoop fluid out of mouth, squeeze the nose and rub with straw.
Place calf upright on chest to get both sides of the chest breathing.
Colostrum is even more important in assisted calvings as the calf’s ability to absorb it is reduced.
Give 3-4 litres immediately to beef and dairy calves, and keep warm in deep straw.

© Kathy Horniblow
6. Look after the dam
Wash your hands and the vulva with antiseptic again and check inside for tears, excessive blood or another calf. Administer pain relief. Use a course of antibiotics if there are any tears or a smelly, dead calf. Put warm water and fresh food in front of the cow.