
7 steps to assessing and managing your soil
Livestock farmers should be assessing their soil structure this spring to identify areas for improvement and to increase productivity from grass.
It has been estimated soil compaction costs up to £250/ha/year. However, more than half of grassland fields involved in a Defra-funded survey were found to have poor soil structure, indicating work needs to be done.
Soil compaction occurs when soil particles are compressed, which reduces the spaces (pores) between them. These spaces carry vital air and water through the soil.
See also: More soil articles
Paul Newell Price, principle soil scientist with Adas, says that in the Defra survey ,a lot of the fields had a limiting layer in the top soil.
“A limiting layer will restrict production. We couldn’t relate the limiting layer to farm type or soil type, so it’s important farmers go out and have a look and use an assessment sheet published by Adas, AHDB and SRUC to assess their soil.”
Healthy Grassland Soils method
AHDB has developed the Healthy Grassland Soils method to score soil structure (one being good, five being poor) and has also provided a decision tree to help producers identify what to do if they have soils that score four or five. You can download it at www.dairy.ahdb.org.uk
Dr Newell Price says compaction typically leads to a drop in grass growth of 10-20%.
“Compaction makes the roots less able to explore for water, and in some dry years, I’ve seen a drop in yield of up to 40%,” he adds.
Dr Newell Price talks us through the seven key steps to assessing your soil.
Step 1 – Surface assessment
Grassland should be assessed at least every two to three years or after heavy grazing or when machinery has been used. For example, if silage has been cut in wet conditions.
Step 2 – When to take a soil sample
Spring is a good time to take samples as the soil is not too wet or dry.
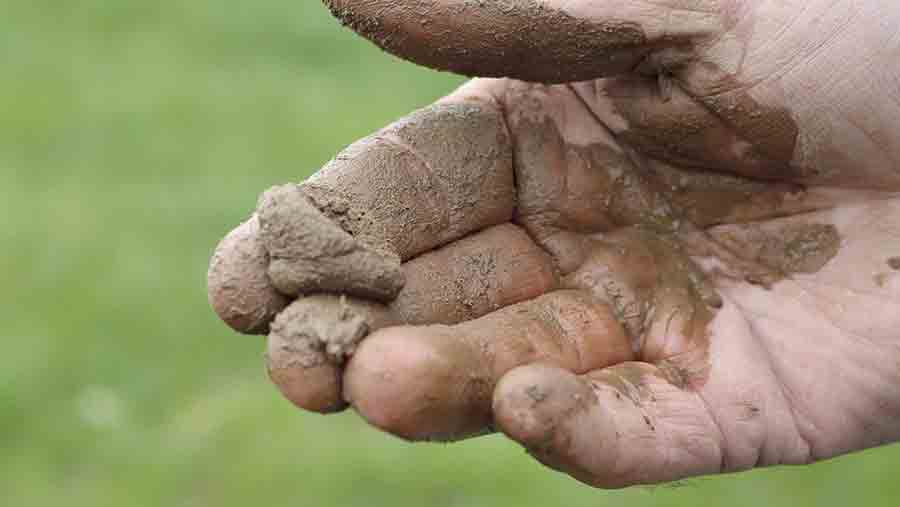
A soil is too dry for assessment if the surface is very firm and there has been no rain in the previous few weeks.
Soil is too wet if a boot penetrates more than 5cm when walking.
Step 3 – Taking a soil sample

At least three samples should be taken in a 5ha field to get an accurate assessment of soil conditions.
The first thing to do is to find an area in the field where you know compaction is a problem, such as high traffic areas like gateways or around feeding troughs.
Counting worms
Spring and autumn is a good time to count worm numbers, which will give an indication of how nutrient rich the soil is.
In a healthy soil block, you should be able to identify 10-15 worms in five minutes.
That way it will make it easier to assess the level of compaction in other areas of the field, as you can compare with the bad level of soil compaction seen at the gateway/trough.
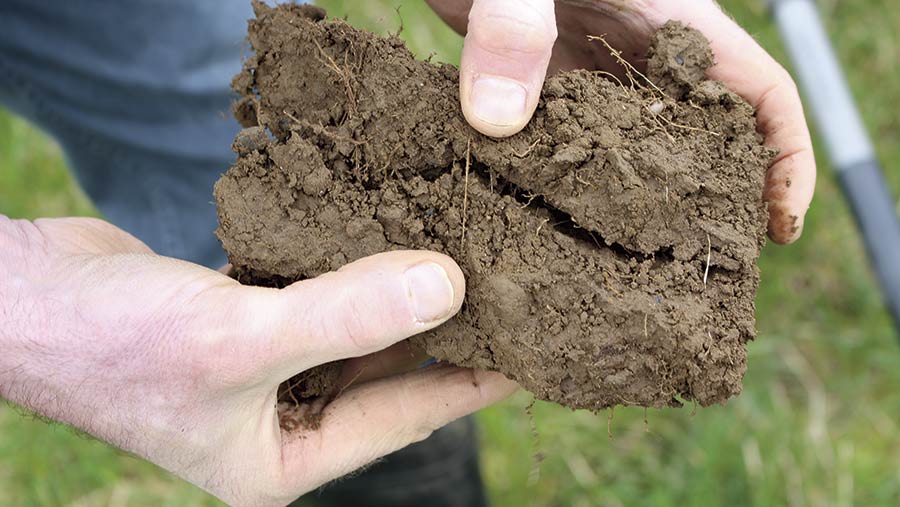
Dig out one spade-sized block to the depth of the spade. The block should be cut on three sides using the spade and then levered out leaving one side of the block undisturbed.
Place the block down on a plastic sheet or board to make it easier for assessment.
Step 4 – Assessing the soil sample
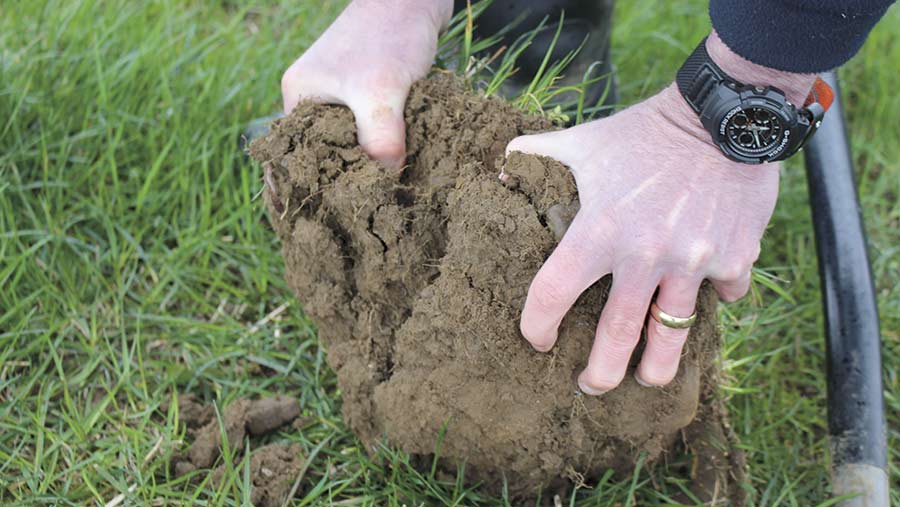
Begin to break open the soil block as if you were reading a book.
If the structure is uniform, then the block can be assessed as a whole.
If the block looks like it has different structural layers, then identify the layer with the poorest structure.
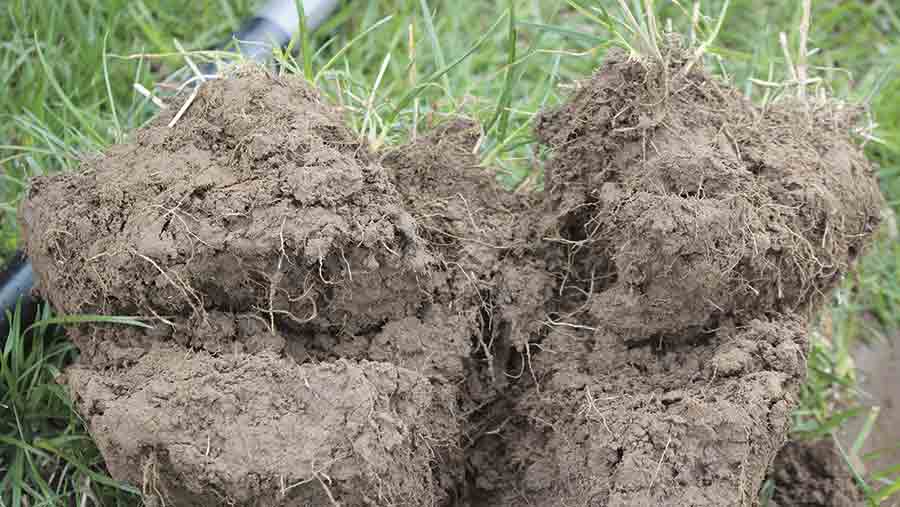
The layer with the poorest structure and more compacted soil is called the limiting layer.
Depending on the level of compaction, roots will often not penetrate the limiting layer.
In a soil sample with good structure, the roots will penetrate right through the top soil and into the subsoil.
If a limiting layer has been identified, then this is the section that needs assessing.
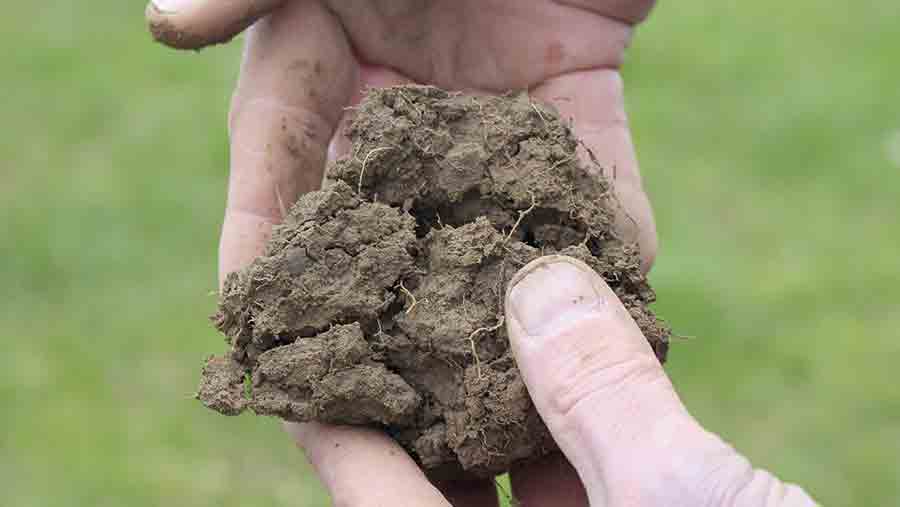
Break up the limiting layer into smaller lumps. If the soil is breaking up into large lumps (>10cm) then action is needed.
Step 5 – Identifying the soil type
Soil type is crucial to how it is managed.
This flow chart will help you identify what soil you have.
Identifying soil type |
||
|
Type |
Drainage notes |
Risk of compaction |
|
Sandy (light) |
Freely drained and less organic material |
If compaction does occurs, sandy soils are often slower to recover due to low organic matter, so mechanical intervention may be needed |
|
Silt/loamy (medium) |
Can be slow draining |
Susceptible to compaction when wet |
|
Clay (heavy) |
Poor natural drainage, remains wet for longer |
High chance of soil compaction when wet, although will naturally crack in dry and frosty conditions, which can help alleviate compaction |
|
Peaty soils |
Often artificially drained |
High chance of soil compaction when wet |
|
Source Adas, SRUC, Newcastle University and AHDB Healthy Grasslands Pocketbook |
||
Step 6 – Scoring the soil sample
- Score 1 (crumbly) – The soil will easily break up in to small pieces. There are good root structures.
- Score 2 (intact) – The soil easily breaks apart, but has slightly larger lumps than score 1. There are good root structures.
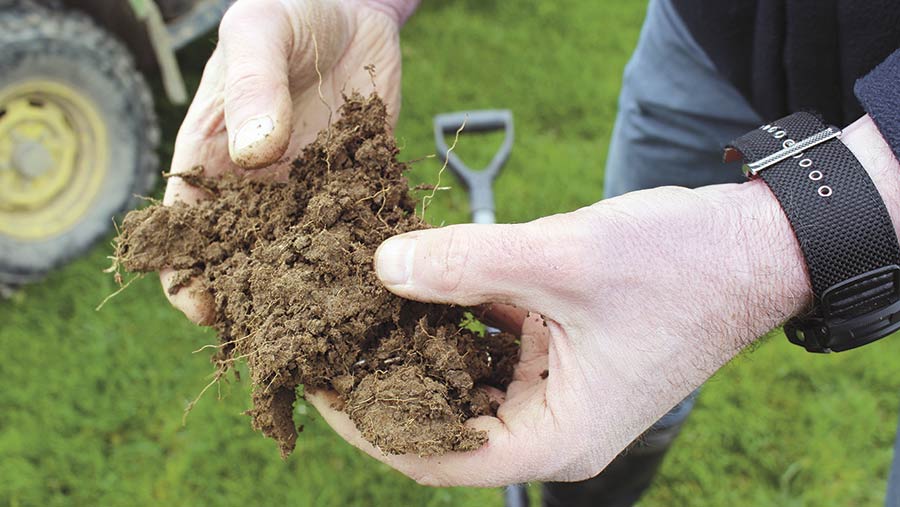
- Score 3 (firm) – Most lumps will break down, but there are some larger, more angular lumps.
- Score 4 (compact) – Effort is needed to break down the lumps and they will be at least 5cm across. Root structure will be limited and there may also be signs of red/orange mottling. You may also see some horizontal plates.
- Score 5 (very compact) – Large angular lumps more than 10cm across. Roots may only be seen at the surface. Some mottling may be seen. You will likely see horizontal plates.
Step 7 – What action to take
A soil scored 1-3 does not require any immediate action.
A score three soil may need assessing more regularly to check the limiting layer is not becoming compacted.
If soils score between 4 to 5, a sward slitter or aerator may be needed if soil structure is poor up to a depth of 10cm. If poor soil structure is detected deeper than 10cm then a sward lifter or top soiler is required.
Using slitters or aerators will increase the infiltration rate, which will give a longer window of opportunity to work the land as it won’t burn out as easily. However, you may not see a yield benefit.
Remedial action should only be done in the autumn, when it’s dry underneath and wet on top.
Soils are more fragile when they are sward lifted and, ideally, stock and machinery will be kept off land over the winter to allow it to recover.