
8-step guide to artificially inseminating a dairy cow
DIY artificial insemination is a popular option on many dairy farms, but the results can be variable.
Successful pregnancies depend on inseminating the cow at the right time – with just an 18-hour window available in each cycle, it is essential to make sure semen is handled in the correct way and that the insemination technique and equipment is accurate.
Wendy Short gets some step by step advice from vet Jonathan Statham of XL Vets’ Bishopton Vets, on how farmers can maximise conception rates when DIY AI’ing.
See also: How to guides
-
Positioning the cow
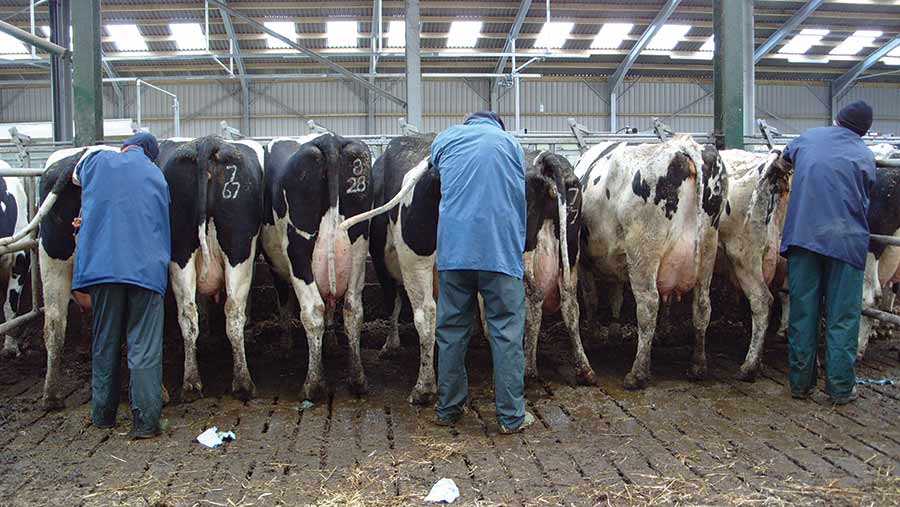
The chance of AI success is greatly increased when the cow is relaxed; it should stand on a level surface with plenty of grip. The cow should also be appropriately restrained.
Use an area which is already familiar to the cow and the facility should be well lit, with provision made for food and water.
Minimise any changes in the routine and do not mix cows from separate groups at the point of insemination. Keep them in their group until they return to the herd.
-
Thawing the straw
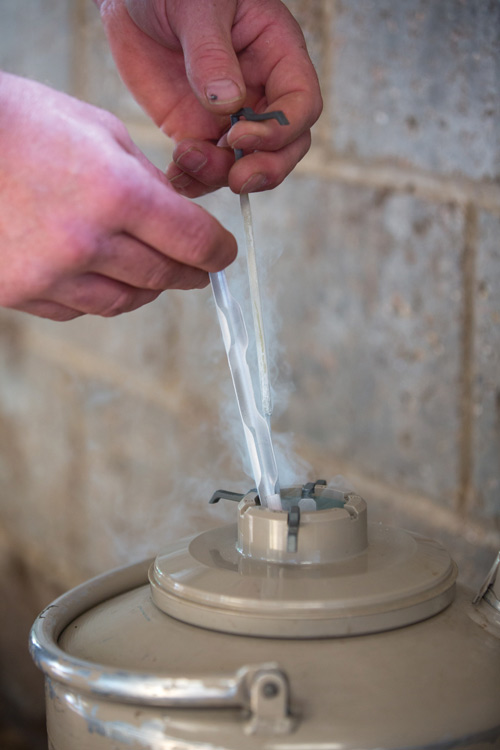
©Tim Scrivener
Before thawing the straw, check the water temperature; it should be at 35C, or as instructed by the semen company.
Particular care should be taken with sexed semen; for optimum results it may require slightly longer and warmer thawing temperatures.
The straw should be removed from the flask with forceps and submerged in the water. Leave it in for 20-30sec for a 0.25ml straw and 40sec for a 0.5ml one.
After withdrawal, wipe it dry and place it in the gun, which should have been pre-warmed by rubbing between the hands. Only thaw one straw at a time.
Cut the crimped straw end at a 90deg angle, then slide on to the plastic sheath and secure with the collar. Hold the gun vertically and gently press the plunger upwards, until the semen rises to the top. The gun is now primed.
-
Preparing the cow
Clean the cow’s vulva with a paper towel and put on a full-arm glove and lubricant.
Insert your arm into the cow, by forming a cone with your fingers while keeping the tail aside with your other hand.
Gently work out any excess dung and if the rectum becomes distended with gas or the cow strains excessively, withdraw the arm and consider re-serving a few hours later.
The cow must be relaxed during the procedure to avoid injury, as the rectum wall is a delicate structure.
If the bladder is full, wait and try again once the cow has urinated.
-
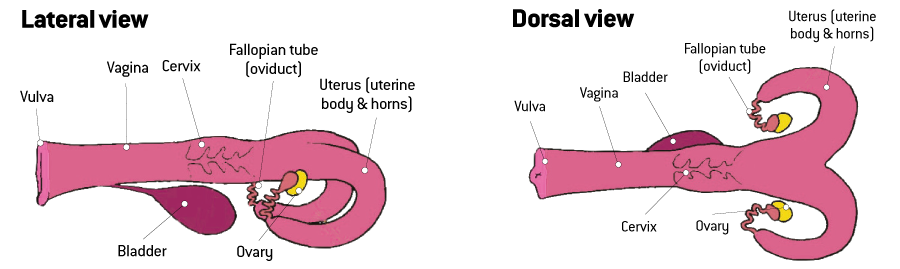
Finding the cervix

The initial landmark is the cervix and this should be located before inserting the gun.
The cervix is normally found on the pelvic rim, but in older cows, it may have moved slightly to one side.
Consult the vet if the cervix is pulled down inside the abdomen and is difficult to manipulate, as the cow could be pregnant or suffering from a uterine infection.
-
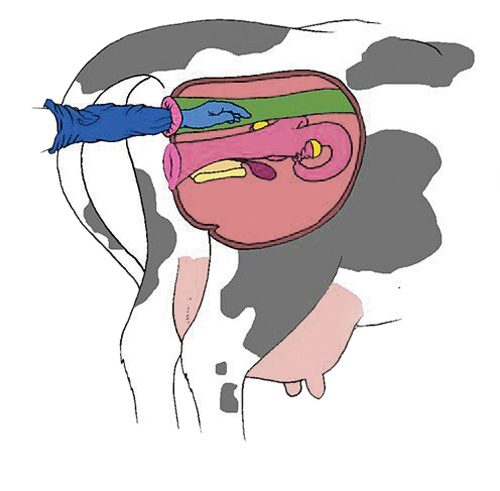
Inserting the AI gun
After locating the cervix, use the elbow to exert downward pressure on the vagina.
This will part the lips of the vulva, in preparation for the AI gun. The lips should be wiped clean, with the gun inserted past the vestibule and into the vagina.
To avoid the opening to the urethra, run the gun tip gently along the roof of the vagina, until the cervix is reached. The gun should be inserted almost vertically and finish horizontally.
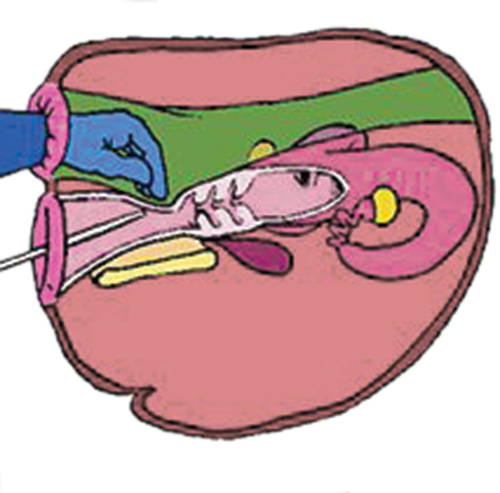
The gun should be inserted as soon as possible after priming, to preserve semen quality. Insemination is a two-stage process:
- Guide the AI gun, so that it is engaged in the cervix
- Pass the cervix over the AI gun.
The blind pocket around the cervix can make it difficult to manoeuvre the gun into the cervical canal entrance.
To resolve this, push the cervix as far forward as possible, while closing the pocket with your grip.
Once the tip is in the canal, you should feel a gritty sensation.
 If it feels sticky, suspect pregnancy, as the gun could be embedded in the cervical seal.
-
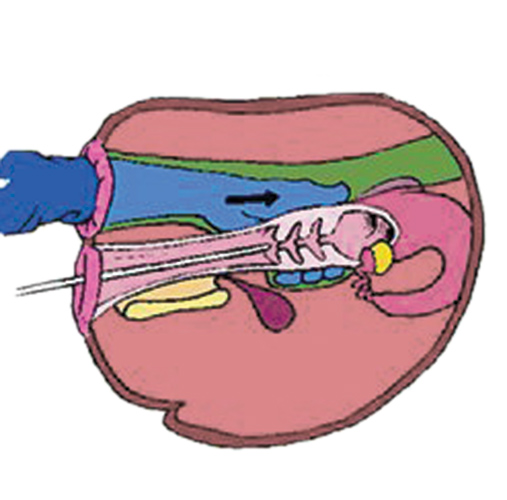
Lining up the AI gun
Line up the gun with the cervix and pass it through the canal, manipulating the cervix back over the tip of the gun.
-
Reaching the cervix
Once the gun is just through the cervix, you should feel a release in resistance to the gun.
The semen should be deposited into the short chamber of the uterine horns, which are located on the other side of the cervix.
If you put your index finger over the end of the cervix, you will feel where the top pokes through and this is the area where the semen should be deposited.
It is where the cervix ends and the uterus begins.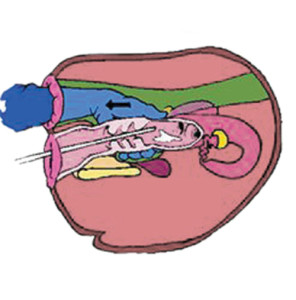
Care should be taken to avoid placing the semen into just one horn. In addition, the walls of the uterus are extremely delicate and easily damaged.
Deposit the semen slowly, by counting 5,4,3,2,1.
Be careful to avoid blocking off one of the horns; this can occur if the cervix is gripped too hard or a finger gets in the way.
-
Maintaining equipment
Do not reuse sheaths; splitting straws increases the risk of disease spread and can reduce pregnancy rates.
Soiled insemination guns should be cleaned after use and treated with boiling water every few weeks. Disinfectant can damage sperm.
Use clean protective clothing and a fresh disposable glove for each insemination.
Common DIY AI mistakes
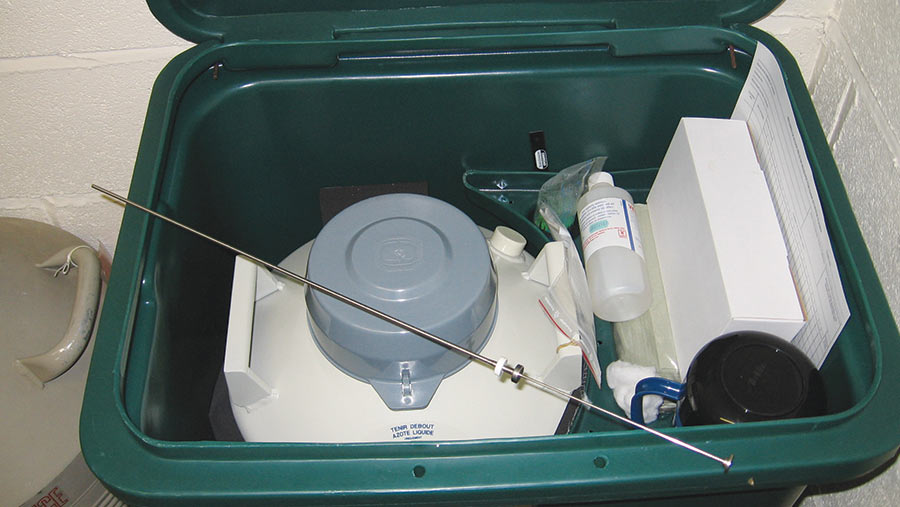
Poor semen storage and removal
 Storage flasks must be handled according to the manufacturer’s instructions and are more fragile than they may appear.
Keep the flask in a secure, well-ventilated area, replacing the stopper quickly to reduce liquid nitrogen loss.
Check nitrogen levels daily and top up when required.
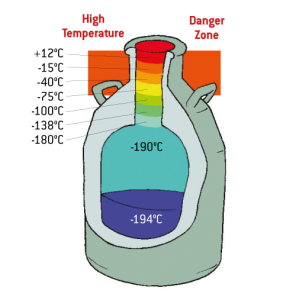
Removal – keep the goblet as far down in the neck of the flask as possible when handling straws.
If it is necessary to bring the goblet up into the neck of the flask, then following a period of 20-30sec maximum, move the canister to the bottom of the flask for at least one minute to recool, before returning it to the neck.
Poor heat detection
The primary sign is standing to be mounted.
Secondary signs include: increased activity and bellowing; mucus on the tail and vulva; sniffing the vulva and urine-licking other cows; mounting other cows; chin mounting/rubbing other cows.

Incorrect timing of service
On average, oestrus lasts for 18 hours, but the figure can be as low as six hours for some cows.
Ovulation occurs some 12 hours following standing oestrus, but cows need to be inseminated before ovulation, so an “am/pm rule” applies, where cows seen at the onset of heat in the morning are served in the afternoon.
Incorrect gun placement
If the gun is placed incorrectly, pull it back slightly as it will probably have become caught in a fold.
Mr Statham says: “Every so often, you may come across a cervix that will defeat you despite your best efforts.
“After a certain point, persistent attempts to pass the gun will risk harming the cow. In this event, the semen can be deposited in the cervix.

“Problem cows should be recorded as an ‘in-cervix’ insemination and examined by the vet at the next visit.”
Cervical insemination will reduce conception rate but so will inserting the AI gun too far up one horn; this may cause bleeding and trauma.
Serving cows that are already pregnant
Serving a pregnant cow carries the risk of breaking the cervical seal and calves can be lost this way. The cause of this problem can be a failure to properly co-ordinate a breeding strategy with the vet.
Poor record-keeping
To maximise the potential benefits of AI, check the information on the straw and record all details of the insemination as soon as possible after the procedure.
Records should be reviewed regularly and success rates evaluated. Send semen samples to your vet at intervals as a quality check.