
How to get a big square baler ready for the new season
It is important to spend time in the workshop with any piece of harvest kit before setting out to the field – but arguably especially so for baler operators.
Lose a window of opportunity to a rain shower in a standing crop and it can dry rapidly, but a swath of grass or straw left on the deck can take a long time to lose unwanted moisture – and quality drops fast.
Goole-based baler supplier Big Bale North specialises in Massey Ferguson and New Holland big square balers, offering sales, support and seven-days-a-week service and parts for customers from Scotland to Cornwall.
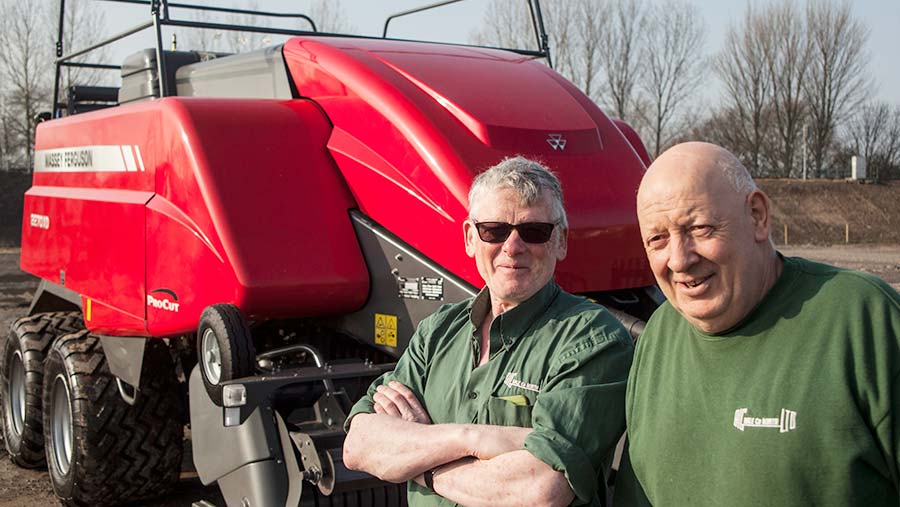
John Woods and Rob Armit © Adam-Clarke
The firm’s workshop manager, John Woods, and foreman, Rob Armit, (pictured) have more than 50 years of experience on balers between them. Here they offer Farmers Weekly some advice and tips on getting your baler set for a smooth and reliable season.
See also: Wider pick-up for New Holland baler-wrappers
In this case, each point is illustrated using a one-year-old, six-string Massey Ferguson 2270 XD with 11,000 bales on the clock, but most of the same basic principles apply to all other big square baler brands.
1. Blow off and wash down
This might sound blindingly obvious, but the fitters at Big Bale North often have machines brought into the yard for a service caked in grime and almost impossible to work on.
Blowing off any loose crop debris and washing down all components will make it easier to spot any problems while preparing your machine for the busy harvest period.
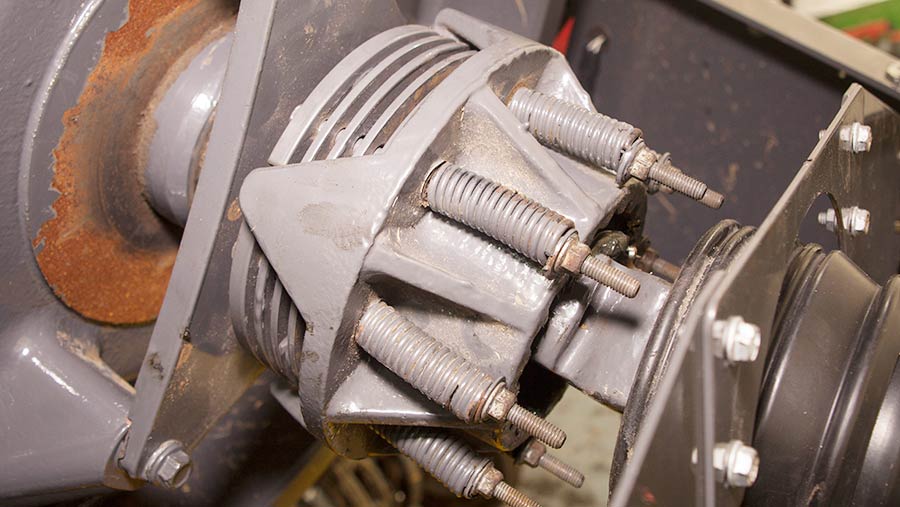
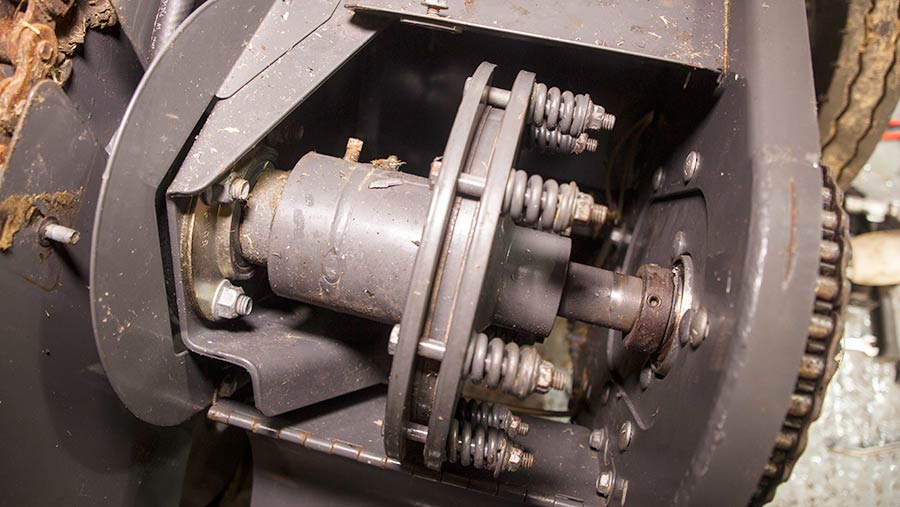
2. Strip and inspect flywheel slip clutch
© Adam Clarke
Big Bale North will always strip down the flywheel slip clutch, whether the machine has done 3,000 bales in the season or 10,000, to check for signs of wear and tear on the five copper-plated steel discs that make up the unit.
Once apart, check each disc for signs of deterioration. Discs in good condition should be cleaned and reused, while worn discs should be replaced.
Problems occur if the clutch slips too much as a result of incorrect tension spring adjustment or if the clutch has been over-greased. With discs costing about £90 each, it is worthwhile checking tension regularly and ensuring it is greased only once a week in busy periods.
Correct tension is gauged by measuring the length of the bolt and springs that hold the clutch together. Details can be found in the operator’s manual.
Big Bale North Tip: When a flywheel shear bolt is blown, before replacing and starting the machine back up, release chamber pressure to prevent the plunger hitting a solid bale and causing the clutch to slip each time. Remember to repressurise before continuing baling.
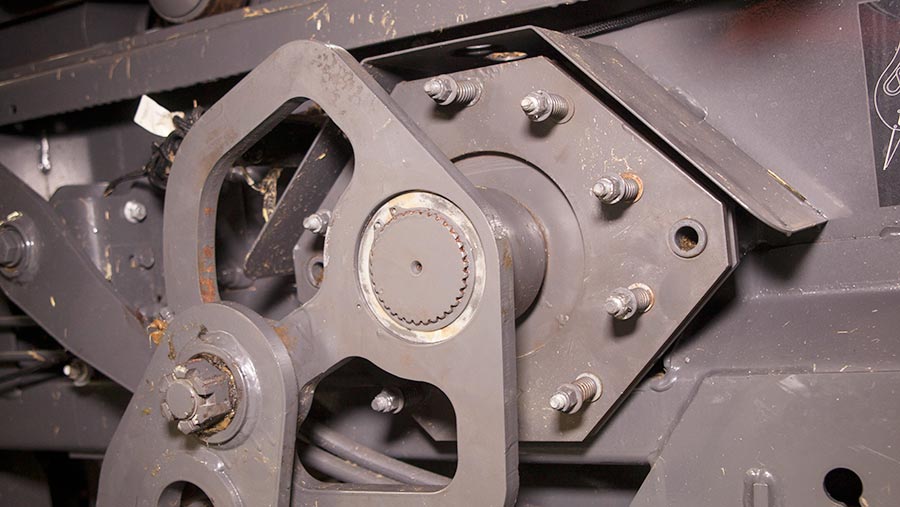
3. Check for play on flywheel and gearbox shaft
After a hard season, movement can develop in the flywheel bearing or the bearing on the gearbox shaft to the rear of the flywheel.
Use the flywheel brake to lift and release its weight to detect any play at the front. Oil leaking from the seal around the gearbox shaft is a tell-tale sign of play to the rear.
This can be rectified by fitting shims at the front of the flywheel. However, if the play is to the rear, it is a significant job to remove the bonnet, flywheel and gearbox shaft to tighten the locking nut and it’s a job that requires an expert fitter.
Big Bale North Tip: On the Massey 2100 XD and 2200 XD series balers, the shear bolts in the flywheel and stuffer drive are the same size and look almost identical, but they require different tensile steel, so operators must ensure they use the correct one.
The flywheel should have 8.8s and the stuffer drive 10.9s.
If you use the softer 8.8s in the stuffer, the bolt will not break cleanly under pressure and will require a lengthy strip-down to remove it. If you use the harder 10.9s in the flywheel, it can damage the bush it sits in.
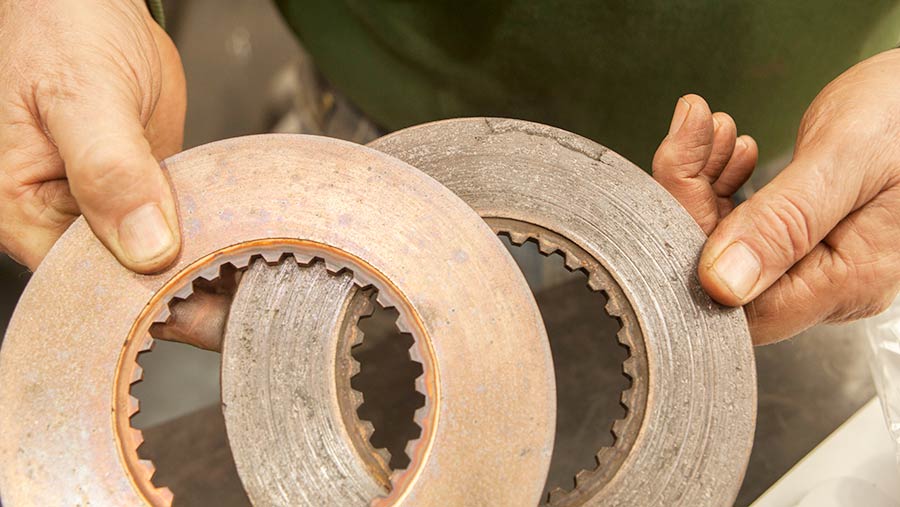
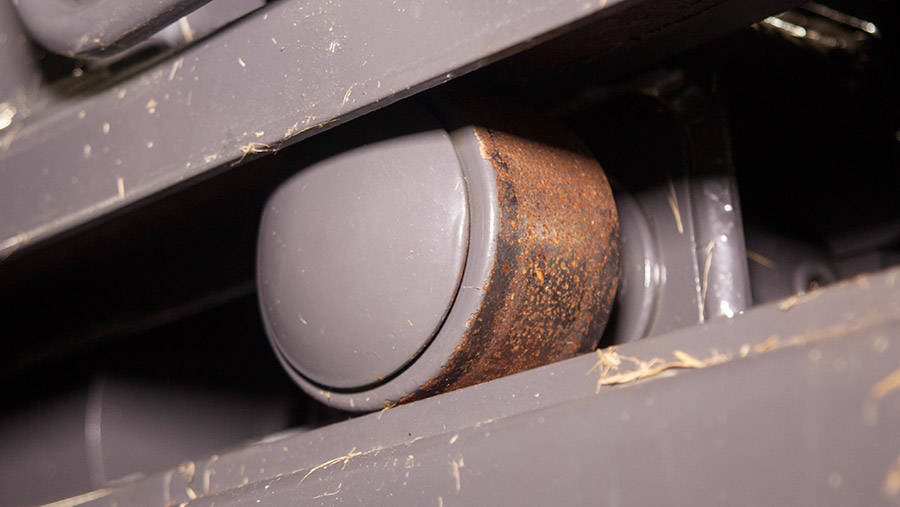
4. Strip down and inspect packer clutch
The packer clutch gets a lot of stick, particularly when picking up wet grass. It should be routinely stripped down ahead of the new season and checked for signs of wear.
© Adam Clarke
The clutch discs have a habit of breaking up around the edges (see picture) and should be replaced where necessary.
© Adam Clarke
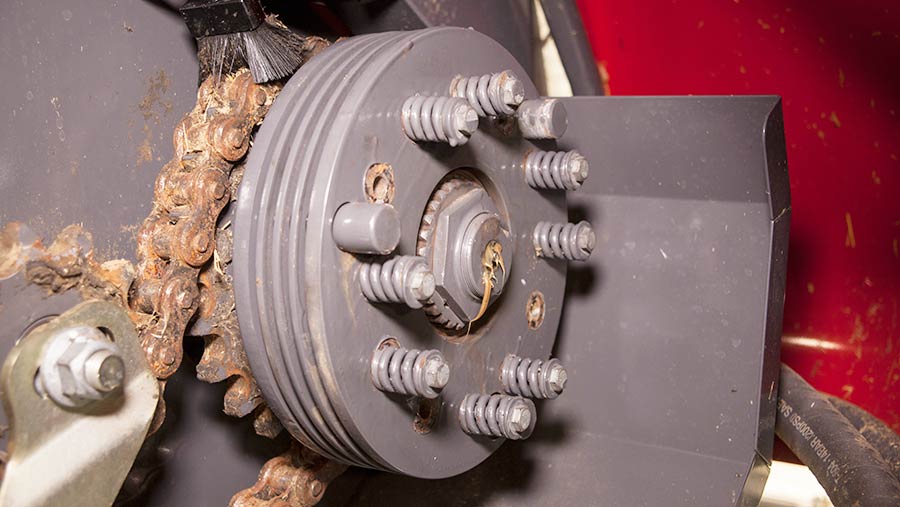
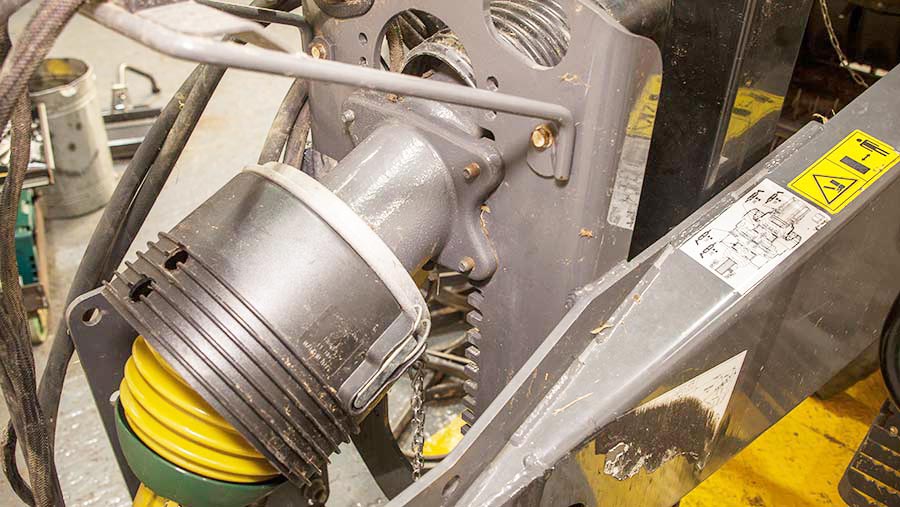
5. Strip down and inspect pick-up clutch
On the side of the pick-up there is another clutch that requires stripping down and reassembling as a matter of course before summer arrives. Discs should be cleaned and any worn ones replaced.
© Adam Clarke
Behind the clutch itself is a drive/overrun hub, which contains two spring-loaded pins that prevent the pick-up mechanism from running backwards.
The pins are held in place in locating holes and if a build-up of dust and debris occurs, the pins stick or won’t sit in tight and can elongate the holes.

© Adam Clarke
These parts should be checked for signs of wear – if the pins break or can’t locate in the holes, the drive fails. Any sign of damage means the drive/overrun hub should be replaced. A tell-tale sign is a clattering noise when the pick-up is running at full speed.
6. Pick-up front bearings
The centre shaft on the pick-up front gets hammered all season long, so the supporting bearings at either end should be checked, along with the bearings in the centre.
© Adam Clarke
Locking collars can work their way loose and result in the bearing clattering around and creating undue wear. Replace any worn bearings and locking collars where necessary.
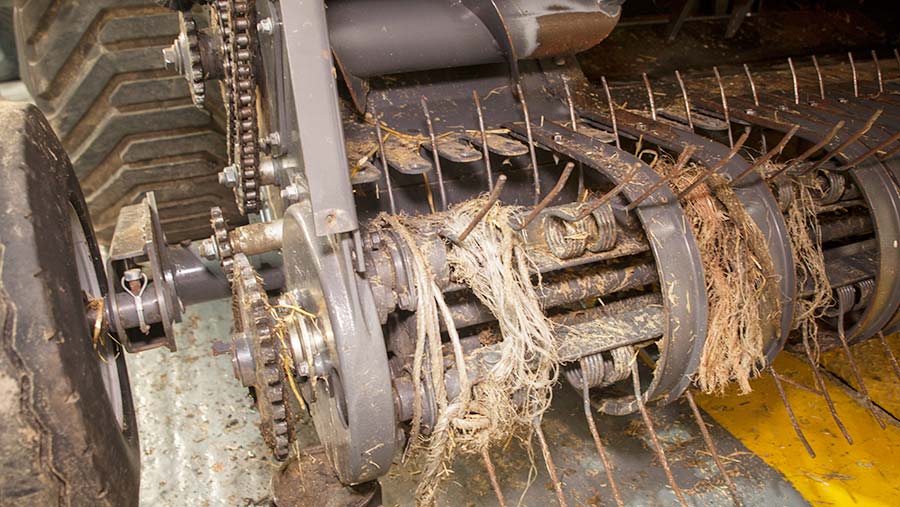
Big Bale North Tip: Operators should not need to be told to pull any string out of any material that requires re-baling in the field.
Often balers come into the Big Bale North workshop with huge amounts of excess twine wrapped around the pick-up (see picture), which can work its way into bearings and – in the worst cases – melt into a solid mass that has the potential to create a fire hazard.
The latest Massey balers have also moved to bearings instead of bushes on the packer mechanism and string must be kept away from them at all costs – a significant period in the workshop would be required to change damaged bearings.
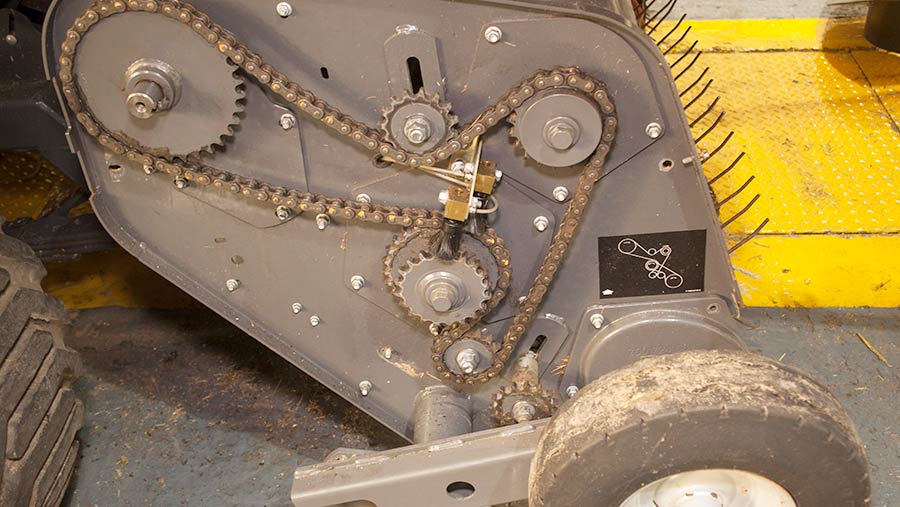
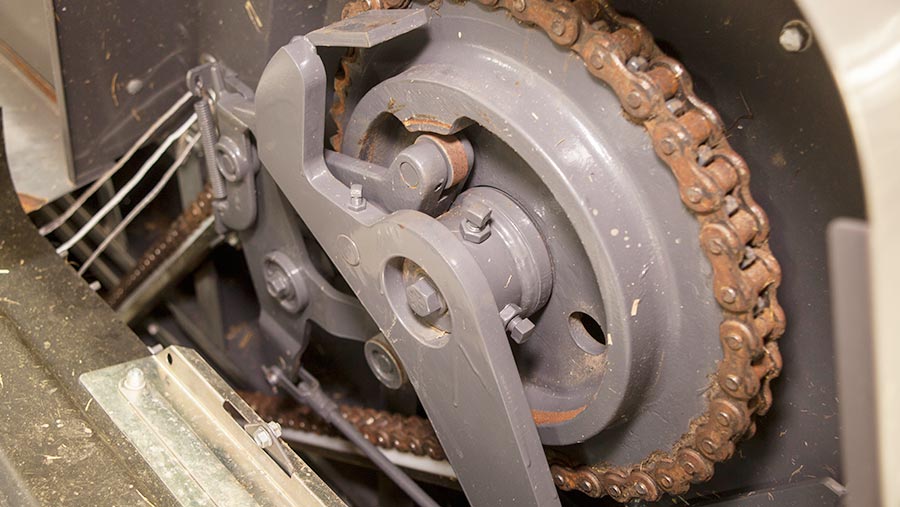
7. Check chain tensions
There are several chains on big square balers. Two smaller chains on each side drive the pick-up front and two large chains further back drive the knotters and the packer.
© Adam Clarke
If set too loose, the chains wear out or break sprocket teeth and bearings much faster, so all need to be tensioned correctly – you should be able to detect a fraction of slack in the chain by hand. If there is no movement, it is over-tight.
Where a chain is out of adjustment, take out a link. On older balers, if you can move the chain from side to side significantly on the sprocket, it should be replaced.
Big Bale North Tip: To oil or not to oil? There is much debate on the need to oil chains on balers and some models now come with automatic chain lube systems.
However, Big Bale North has not seen evidence of chains lasting any longer with regular applications of chain oil than those that run dry. In fact, Mr Armit feels oiled chains wear faster because of dirt and grime sticking to the chain during work.
8. Strip down the stuffer and knotter brakes
These two brakes work hard all day, every day and should be stripped down every year and the two plates inside replaced as a matter of course.
© Adam Clarke
Failure to do so can result in the hubs seizing up, making removal difficult for future maintenance.
9. Grease plunger roller bearings
Bearings on the plunger should be greased once a year – on the Massey 2200 series, they will be covered by a cap that can be removed to reveal a grease nipple.
© Adam Clarke
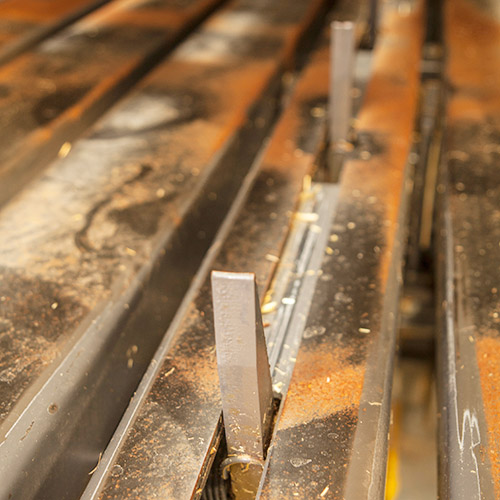
10. Check knotters and needles
The thought of troublesome knotters and needles makes any fledgling operator break out in a cold sweat, but checking all components are in good working order before heading out on the season’s first job will pay dividends.
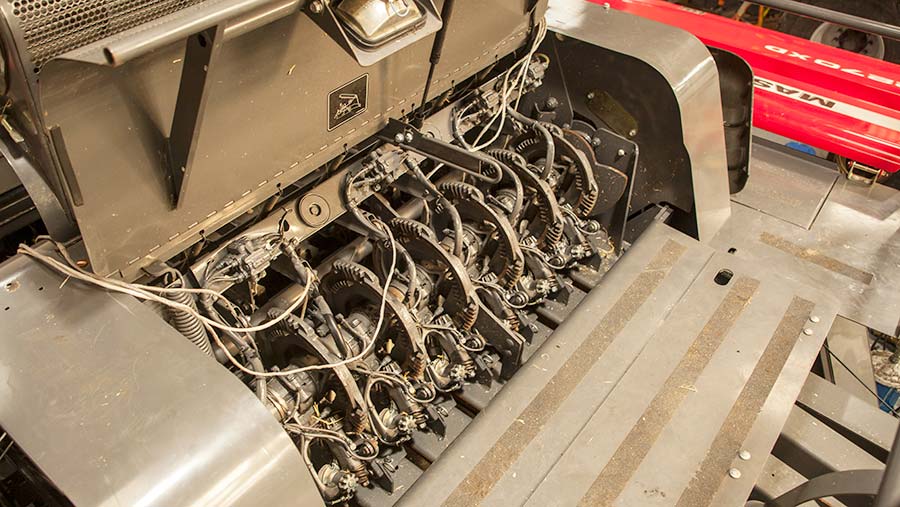
© Adam Clarke
Up on top of the machine, take out the holding pin on each knotter and lift up, carefully taking note that all moving parts – including cams, pinions, stripper arm, billhook and twine disc – are moving freely and clean of debris.
© Adam Clarke
If fitted with automatic lubrication, use the control box’s test procedure to run the system for 30 seconds and ensure it is delivering oil to each knotter with no leaks.
© Adam Clarke
The gap between the billhook and the stripper arm as it passes should be tight. Wear causes the gap to widen significantly once the machine has pumped out 20,000 bales and results in knotter failure. Use shims to close any gaps that have widened.
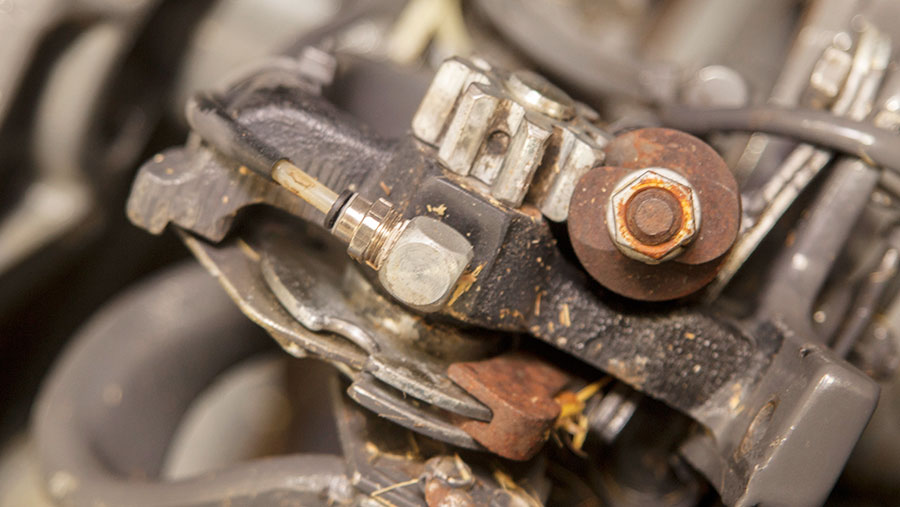
Rollers in the needles and tucker arms (see picture) should be checked for absence, wear or seizure. If there is any sign of a problem they should be replaced to prevent knotter failure once the season starts.
They can be a particular problem on balers that are used extensively on grass silage jobs.
Big Bale North Tip: When inspecting knotters, or lifting them clear to fix broken strings, be careful not to hold them by auto-lube pipes. If broken pipes are pulled off, it can lead to the connected mechanism running dry and increasing wear.
Any breaks will require new pipe fittings – it is worth carrying some spares in the toolbox.
Also, before heading out on the first job of the season, run the machine up to full speed and trip the knotters several times to check for any faults.
This can be done using a specially made tool to allow the operator to pull out each string simultaneously to simulate baling in the yard.

© Adam Clarke
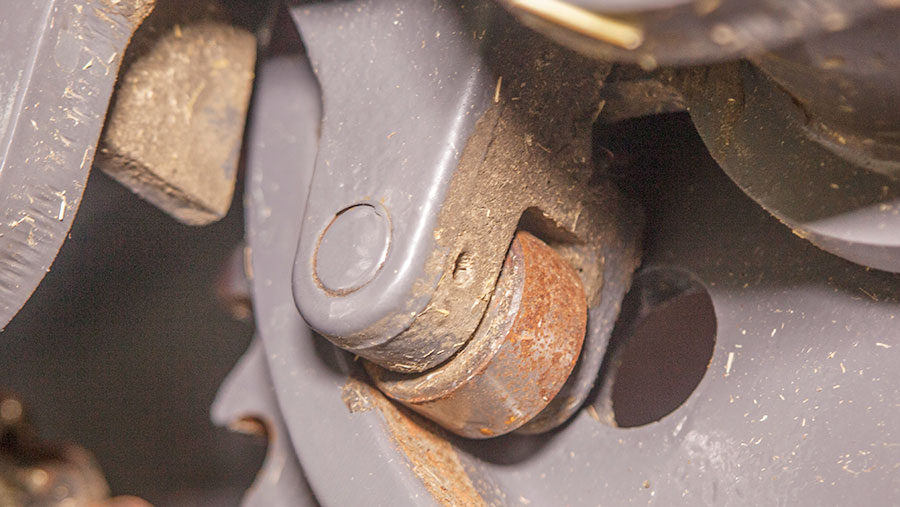
11. Check rollers on knotter and stuffer drives
There are two small rollers – one on the knotter drive dog arm and the other on the stuffer drive dog arm.
© Adam Clarke
These can seize up and must be checked and replaced if they can’t be freed.
© Adam Clarke
12. Check bale ejector spikes
If a big square baler is used for long periods without ejecting a bale, dust and chaff can build up around the ejector spikes in the bale chamber and stop them working.
© Adam Clarke
It is good practice to eject regularly through the season to keep them moving and blow the crop reside out from around the spikes when cleaning down.
13. Check axles and brakes
Brakes should be stripped down and checked for shoe wear and any debris in the linings.
Newer models will have guards to minimise debris being a big issue, but because of their closer position in relation to the stuffer, front axle brake linings in particular can fill with dust.
© Adam Clarke
Pay particular attention to the rear brake shoes on a twin-axle model, as these tend to wear out much faster than the front.
Pins that hold springs and balance beams together require regular greasing through the season and can seize up quickly if not maintained.
Check that all the nipples still take grease and if they don’t, strip them out, clean them up and reassemble.
Big Bale North Tip: Ensure that steering rear axles are locked off for road transport, no matter how small the distance. This will reduce tyre wear and the risk of damage to the fabric of the axle.
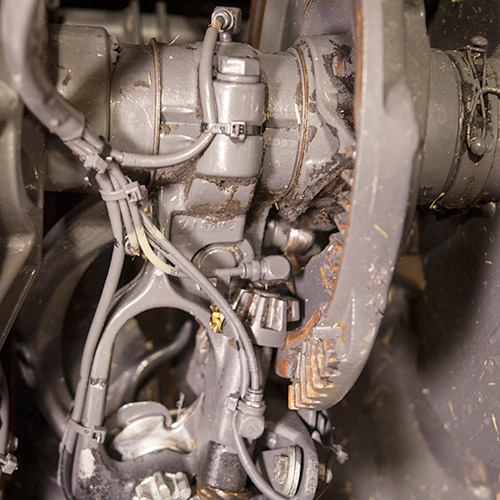
14. Check hydraulic tank level
The latest balers run on their own oil supply, with the tank typically located on the front right hand side of the baler.
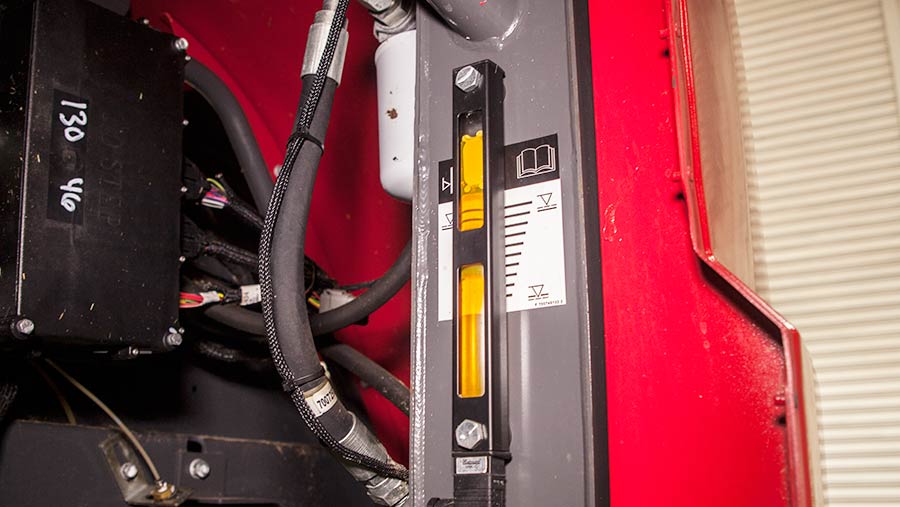
© Adam Clarke
Levels should be checked and topped up if low – the only circumstance in which the filter will need changing is if a pipe bursts and let dirt into the system.
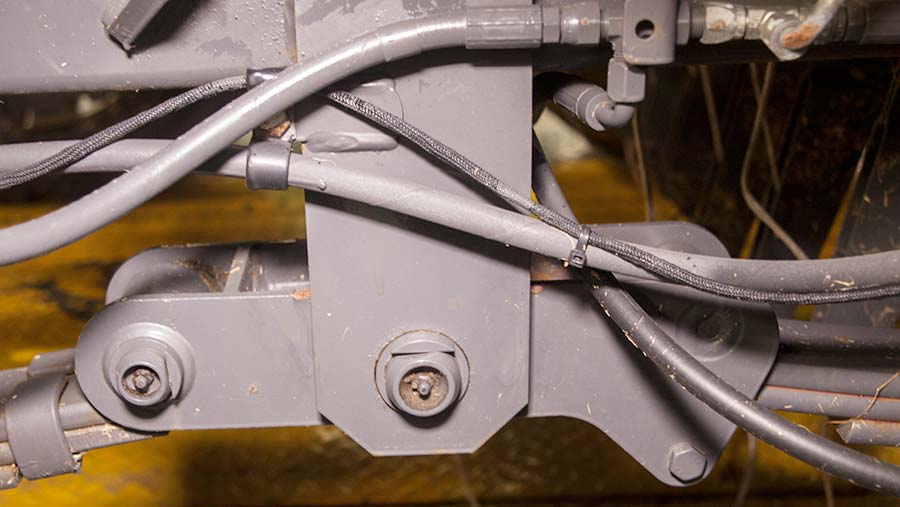
Match baler to the tractor
© Adam Clarke

© Adam Clarke
Whether a baler is pulled by the same or various tractors through the season, Big Bale North says you should ensure the two are married up correctly each time to reduce the risk of damage to the drive line.
From the pto on the back of the tractor to the flywheel, the driveline should be as straight as possible – and it is possible to adjust both the drawbar position and driveline position within it to achieve this (see pictures).
It is estimated that two men can correctly set up the baler position for a tractor in 30 minutes and Mr Armit says failure to do so can result in excessive load being put on the driveline, leading to increased shear bolt failure and other mechanical issues.
“With the wide-angled universal joints you can get nowadays, people expect to run them at any angle or turn as sharply as they like when working in the field – and not have any problems.
“They can still be knocked out of line and the subsequent vibration will go right through the machine and put pressure on all the other components,” he explains.
Mr Woods adds that length of pto shaft is also critical: if cut too long or too short for the tractor, it can bend or twist during operation.
Big Bale North sends new balers out with an uncut shaft for the tractor and he recommends it is cut so the outer tube is running with about 6in over the inner tube during level operation.
“You can then make adjustments at the drawbar for different tractors,” he says.
