Ten steps to maintain your Opico dryer
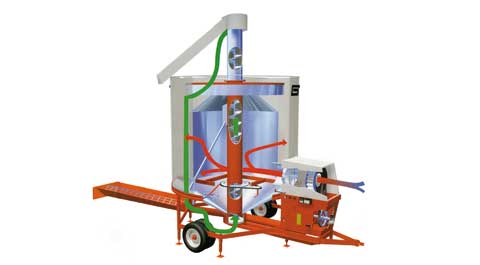
A broken down grain-drier can create the ultimate harvest-time headache, but a few simple winter checks can help you avoid a lot of hassle. Nick Fone reports
- Introduction
- Belts and pulleys
- Bearings
- Electrics and solenoids
- Gas solenoids
- Burner ring
- Main auger
- Loading auger
- Agitator drive
- Cleaner screen
- Fan
Mobile grain driers are a particular favourite for farms that have stores dotted about all over the place. Their versatility and ability to remove moisture at a rate of about 5% every hour has made them popular even with their modest throughputs of between 4t/hour and 6t/hour.
Since Opico first began importing GT driers from North America in the early 1970s the company has sold more than 5,000. They range in size from 9t-18t with the options of pto or electric drive, gas or diesel fired burners, completely automated controls and low noise fans.
Here grain drier specialist John Thorburn guides us through a quick 10-point pre-harvest check designed to keep things running smoothly.
Most major components are driven by rubber belts. That includes the main auger, the agitator arms, the fan, and the loading auger.It’s simple straightforward advice for all of them – replace any rubber that looks remotely ropey, take up the slack and make sure nothing is over-tight, as that will cause premature bearing wear.
Bearings are the most common component to give up the ghost, particularly those at the bottom of the main auger which tend to sit in water if the machine is left outside.
To get a true picture of bearing life expectancy slacken off the drive belts and get a decent length lever in to check for slack.
Grease lightening
Many of the GT drier’s greasers are grouped together under the fan hood. John Thorburn recommends just one pump of grease for each nipple every day. More than that will pop out the bearing seals and allow dirt to get in which will soon turn to grinding paste with the obvious consequences.
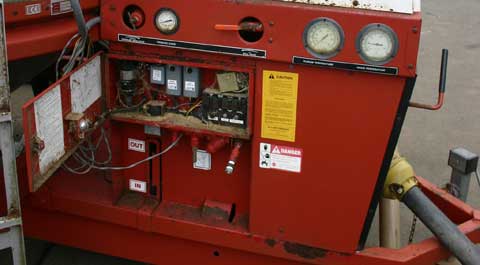
Cleanliness is next to godliness when it comes to GT driers’ electronics. Regularly blow out the control box, particularly before the machine goes into hibernation for the winter. Mice take a particular liking to the wiring and enjoy wiling away the long nights making copper and rubber nests, with the inevitable result that the drier doesn’t fire up the following summer.
Opico GT driers have a collection of shaft speed sensors which automatically shut off gas flow if a belt breaks or a shaft jams. If any one of these is not working then you’ve potentially got an inferno on your hands. Best to get the experts in to check they’re all in action.
It’s a similar story for the solenoids that control gas flow. They need to be regularly cleaned and calibrated, as propane isn’t guaranteed to be free of contaminants. Call in a trained fitter if they’re malfunctioning. Diesel-fired versions tend to be even more complex.
Drain the oil trap on the liquid gas line – this will reduce the chance of contaminants entering the vapour gas line, causing potential problems. Set the gas pressure regulator to 26psi to achieve the optimum burner heat.
Top tip
Always wait an hour after the gas tank has been filled before firing up the burner. That way any dirt will settle out and should not be drawn into the drier.
Rarely the cause of many problems, the burner ring’s gas outlets can get blocked by debris from the gas tank. An oxy-acetylene torch cleaning file of the right size will generally do the trick – 5/64”.
If the burner won’t fire up, it may be that the air-switch feed pipe is blocked. Gently disconnect it and blow air backwards along its length.
The spark plug igniter will need checking and more often than not just needs a couple of swipes with an emery cloth between the electrodes.
Check the condition of the flame detector (auto pilot), this component controls the electrical circuit during operation and will prevent the burner operating if it is faulty.
The main 12in diameter central grain recirculation auger should be considered a wearing part. Its ability to draw the crop through the machine at the required rate is down to flight and sleeve condition and will have a major bearing on the drier’s efficiency.
Check flight wear from the top when the discharge head and chute are removed.
As a general rule of thumb it should churn out grain at a rate of 1t/min. An easy test of this is to time how long it takes to unload a full batch: i.e. a 9t drier should empty in nine minutes.
A replacement auger and sleeve will set you back £1,340.
The plate that runs the length of the auger controls flow rates. If the drier is slow to load, check the clearances and adjust to get maximum throughput.A drive-dog transfers power to the auger at the point where it folds. Often this can wear and break or bend. Check its condition and run a bead of weld down either side if it’s looking tired.
Remove the drier’s bottom inspection hatch cover to get access to the GT’s inner workings. A couple of feet up, just inside the plenum (central mesh hot air cylinder), over towards the burner and fan you’ll find the gearbox that drives the critically important agitator arms that stop grain clumping and consequently help to avoid fires.
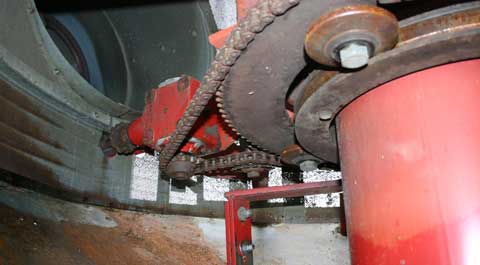
The gearbox doesn’t swallow much oil, so it’s probably worth draining it and refilling it to the right level (using the level over-flow plug).
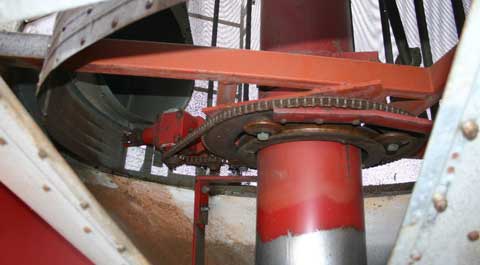
The chain-and-sprocket drive just needs a tension check and a light oiling.
The agitator guide rollers and race track which they run in should be checked to ensure the agitator is running properly – tighten up any slack using the cam nut on the roller mounting bolt.
Close to the top of the main auger is a cleaner screen that separates dust, small, broken grains and weed seeds. There are two different sizes: One to handle small seeds such as rape and linseed, the other to deal with cereals. Check both are on hand and in good condition. They should slide in and out of their runners easily.
They are crucially important. If the wrong one is fitted you’re likely to end up with all your good grain coming down the discharge chute or a very dirty sample.
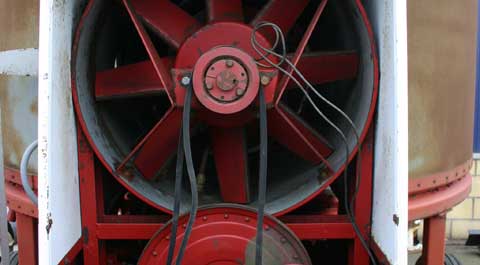
A lever-operated over-centre cam engages the fan drive belts. Check it swings in and out of work easily and look out for bearing play when the belts are slack.
Ignoring it can be a costly oversight. Often worn bearings lead to the whole drive shaft – from the pto or electric motor – having to be replaced.It will cost between £270- £690 in parts alone.
Based at Duns in the Scottish borders John Thorburn and Sons is Opico’s number one outlet for GT driers. The company offers a thorough pre-season service that takes in everything including a complete overhaul of the gas and electrical systems.
Common replacement parts
| D25161 | Flame detector (auto pilot) | £142.39 |
| K25030 | Air switch | £115.36 |
| 77508 | 1/2 inch solenoid valve | £78.90 |
| 77248 | Shaft speed sensor | £28.89 |
| 77384 | Spark booster | £157.79 |
| A28000 | Agitator roller bearing kit | £30.31 |
| D22320 | Spark plug | £27.78 |

