
Video: How to fit trailer air brakes
We’ve shown how you can get your hydraulic trailer brakes up to stratch, but if you want ultimate stopping power you should consider updrading to air.
Once the sole territory of heavy haulage, air brakes are becoming more and more common in agriculture. And that’s no coincidence – they’re more efficient, more controllable and more reliable than old-school hydraulics.
Fitting out a trailer with pneumatic anchors isn’t rocket science either, and it might cost less than you think (a load-sensing oil and air kit from TractAir comes in at just shy of £600).
There’s no reason that someone reasonably competent spinning spanners can’t pipe up an oil-braked trailer with a retro-fit air-brake kit. With the help of East Yorkshire air brake specialist TractAir Nick Fone shows how it’s done.
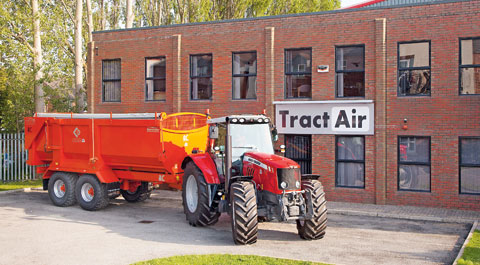
TractAir
TractAir designs, assembles and supplies braking systems to nearly all the major tractor manufacturers.
Over 90% of what the company makes is exported worldwide. Demand for air-brakes is clearly on the up – since 2009 the firm’s turnover has grown from £3m to an expected £4m this year.
The company is the main supplier of factory- and retro-fit air-braking systems for John Deere, Massey Ferguson, Case New Holland, Claas, Valtra, Same Deutz Fahr, McCormick and Landini as well as many trailer and implement manufacturers.
Couplings
Rig up the air-line bracket on the hose hanger at the front of the trailer. This is the point where the red and yellow spiral suzies meet the static plumbing for the tank supply and the main control valve. It’s also where the all-important line filters need to be positioned so they can’t be ignored.
Shunt valve
Find a suitable spot somewhere close to the front of the nearside chassis rail to fit the shunt valve. When the red line is connected and there’s pressure in the system, this should pop out. Disconnect the red line and it should stay out. A gentle nudge should prompt a satisfying hiss as the air is released, allowing the trailer to be shunted around the yard (or dragged around a muddy maize field by a forager).
Brake rams
Whip off the old hydraulic brake rams and buzz off their mounting brackets with a grinder to leave a clear, shiny stretch of axle to weld new brackets to. TractAir supplies brackets for both round- and square-section axles, although increasing numbers of trailer makers are having them stitched on as a matter of course whether the trailer is to be kitted out with air brakes from new or not (as was the case with the Larrington 16-tonner we were working on).
According to TractAir, most ag trailers will be refitted with new brake rams (brake chambers or actuators in proper trucker-talk) capable of being squeezed on by both air and oil to cater for tractors without an air service.
Relatively bulky in comparison to slimline hydraulic rams, these need to be positioned so that they are at 90 deg to the brake lever at the point that the pads make contact with the drum. This can be tweaked to a certain extent by swapping from hole to hole on the lever.
Tank, pipework and plumbing
Weld or bolt the air-reservoir mounting brackets onto a suitable place on the chassis. With the tank in place, it’s then time to start running and plumbing in all the pipework.
Most air-brake issues come about as a result of water (usually condensation) in the system. All tanks will have a spring-loaded manual drain valve but this needs to be emptied at least once a day. For £20 an auto drain valve is a no-brainer. This clever cigar-shaped insert screws in as a direct replacement for the old one and continuously siphons moisture out of the stored air.
Load-sensing valve
A set-up capable of adjusting braking force according to the weight being carried is essential when working with ultra-responsive pneumatic systems.
But correctly positioning the valve is critical. More on load sensing valves. With the TractAir system the valve is mounted on a chassis rail and a rod connects it to a rubber-damped bar running between the two axles.
Then as the chassis falls as it is loaded the valve opens up to allow full pressure through to the brakes. When the load is tipped the chassis rises away from the axles once more and the valve shuts down to a point where the trailer will come to a halt without the wheels locking up. That’s the theory anyway – getting it set up correctly is a little more tricky.
Load-sensing set-up
The most straightforward way to get it in the right ballpark is to beg, steal or borrow an accurate air-pressure gauge. With it plumbed into the test port on one of the brake-actuators, get your test-pilot to jump on the pedal. With the valve in its fully laden position, it should read somewhere in the region of 6 bar. With no load it should be closer to 2 bar.
To alter this slacken off the bolts where the rod connects to the valve shaft and rotate the coupling to either increase or decrease the barking force accordingly.
With everything plumbed up and ready to go, there is no substitute for road-testing. On flat, level ground with the trailer empty, run up to max speed and jump on the anchors. You should be pulled up smartly but not abruptly. More importantly the wheels shouldn’t lock up.
If they do, it’s back to the workshop to tweak the valve back a notch. Then load up to full capacity and try the same trick. The whole rig should come to a standstill in just the same manner as before.
Making the connection – red or yellow first?
| Ever wondered exactly what those curly yellow and red air lines do and why there are two?
Red – supplies air to the trailer tank via the relay emergency valve and effectively does the braking. Yellow – provides the signal to the trailer valve telling it how much air to let through to provide progressive braking force. If there’s a pressure drop in the red line then the fail-safe is triggered and the valve will immediately jam the anchors on. Because of this, it is very important to hook up those curlywurly suzies in the right order. Always disconnect the red line first so the brakes come on when you un-hitch. Always reconnect the red line last to release the parking brake. |
Next week: how retro-fit air brakes work on your tractor
