
Advice on carrying out a dynamic dairy parlour test
 © Jim Varney
 A dynamic parlour test is an ideal opportunity to take a milking parlour for a “test drive” and identify ways in which it can be improved and made more efficient.
It is a way of assessing the parlour during the milking process, compared to static testing which puts the unit through its paces without cows present.
Red Tractor assurance recommends a dynamic or “milking time test” is carried out annually by a competent engineer or technician that holds accreditation through the Milking Equipment Association or similar.
With no specification on what this should include, many tests just include a basic assessment of vacuum levels and vacuum stability.
See also: How a farmer slashed milking times and improved udder health
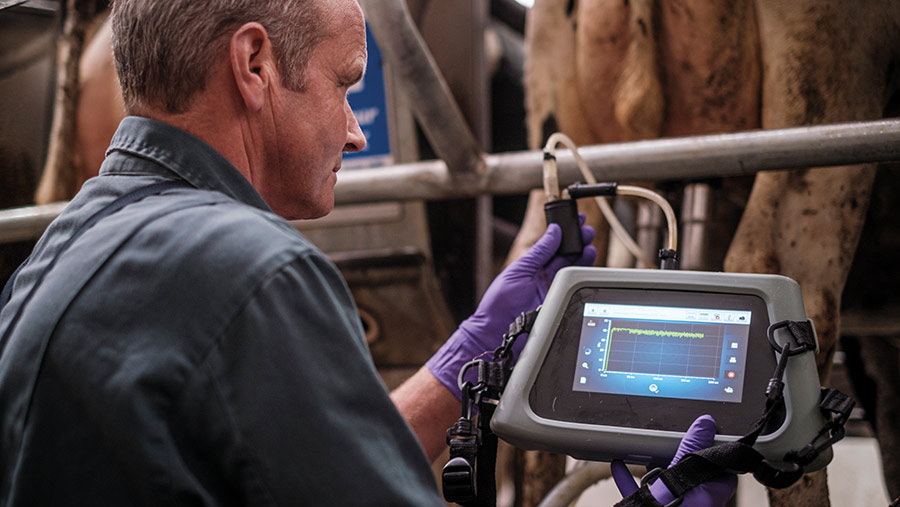
However, milking specialist Ian Ohnstad of The Dairy Group believes farmers could be missing a trick by not taking the opportunity to look in detail at the whole milking process.
“Rather than just evaluating vacuum levels and stability, it’s important to look at the relationship between the milking machine, the operator and the cow,” he says. Only then can conclusions be made as to whether the system is running satisfactorily or not.
Similar to servicing a car depending on its mileage, Mr Ohnstad advises adapting testing frequency to reflect how many hours the parlour operates.
For example, an annual test may be suitable for a parlour that runs four hours a day, but for a parlour operating 15 hours a day, testing every six months may be more appropriate.
Mr Ohnstad advises choosing a technician that will look at all the following main areas as part of a dynamic test:
Mechanical Observations
Vacuum levels
Incorrect vacuum levels in the short milk tube will affect milk flow. The vacuum can be assessed by the technician using a specialist device.
The nominal vacuum level should be set to achieve an average claw piece vacuum of 32-42kPa at peak milk flow. Levels can be manipulated by adjusting the working vacuum level.
Vacuum stability
Vacuum stability is just as important as the overall level. Vacuum levels should not fluctuate by more than +/- 2.0 kPa in the receiver vessel.
Inadequate effective vacuum reserve can be one reason for instability. For example, if there is insufficient reserve and air intake occurs due to incorrect cluster attachment technique, vacuum stability can be negatively affected. This will reduce milking efficiencies.
Vacuum in the mouthpiece chamber
Consistent effective vacuum is needed in the mouthpiece chamber to ensure the stability of the units on the cow. Excessive vacuum can cause discomfort to the cow and incomplete milking.
If vacuum levels are too high, are the liners correct for the average teat size of the herd?
Pulsation
There should be regular, intermittent air admission to the pulsators. Listen to each pulsator for uniformity between them. Check that the liners are mounted correctly.
Liner slippage
If more than 5% of cows exhibit slippage, ask why. Is it herd-wide or just a small number of animals? This should not widely occur if the liner size is matched to teat dimensions, vacuum levels are correct, and the milking unit is positioned correctly.
See also 4 things to check when you are milking
Operator observations
Attachment of milking units
Are the units being attached efficiently with limited air admission? Once attached, the automatic cluster removal (ACR) cord should also be full extended and the milking unit arranged so it hangs squarely.
Removal of milking unit
For manual take-off, the vacuum supply must be restricted (using a pinch clip or kink in the long milk tube) for about two seconds before unit removal.
This allows time for the vacuum to dissipate through the cluster air bleed. Blocked air bleeds can be identified by flooded claw pieces and milk splash when the cluster is removed. Blocked air bleeds lead to slower milking and liner slippage.
When ACRs are in operation, check that cords aren’t pulling off units too soon or too late. Over-milking must be avoided. Units should detach when flow rates drop to:
- 3-0.5kg/minute on twice-a-day milking
- 6-0.9kg/minute on three-times-a-day milking.
Cleanliness of operator
How clean is the team working in the parlour? Gloves and overalls should be clean and washed at the end of each milking. Check the cleanliness of milking keypads as an indicator of overall hygiene.
Operator behaviour
Cows should be handled quietly, calmly and consistently to encourage good milk let-down. If more than 5% of cows defeacate during milking, ask why. For example, is loud behaviour causing them stress?
Consistency of routine
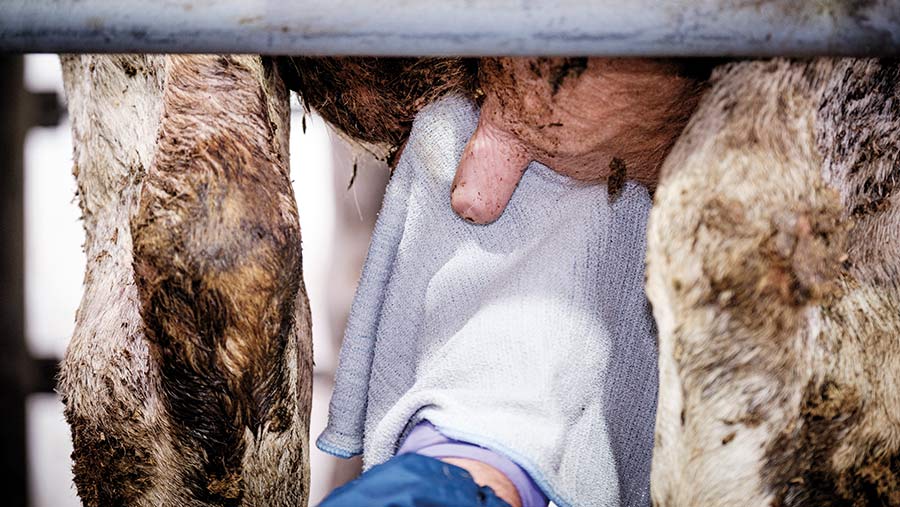
Every cow should receive the same preparation at every milking and teats should be clean, dry and well stimulated prior to cluster attachment.
On average, a prep-lag time of 60-90 seconds between stimulation and attachment should be adhered to for optimum milk let-down. Disinfectant should be applied evenly to each and every teat.
© Jim Varney
Cow observations
Teat condition
Score 20% of the herd and look for signs of teat-end hyperkeratosis (excessive keratin growth), teat oedema (swelling) and congestion. Also assess teat colour and signs of palpable teat base rings. For example:
- Red/blue teats – can be caused by high milking vacuum, faulty pulsation or mismatch of liners and teats
- Ringing at the teat base – caused by aged liners, over-milking and high milking vacuums
- Hardness at the teat end – linked to a stiff lip on the milk-piece, overmilking and high milking vacuums.
Cleanliness
How clean are the cows? Check cow, udder and teat hygiene. If cows are dirty – does environmental management need to improve? Could teat preparation be better?
The University of Wisconsin has a Teat End Scorer App to help identify issues with teat condition.