
The ins and outs of a clutch rebuild
Williams Grimshaw, workshop supervisor for Kramp UK, Walterscheid’s UK agent, steps Andrew Pearce through a pin clutch rebuild.
The clatter clutch (or to give it its full and glorious title, the radial pin clutch) turns up where a driveline needs tailorable overload protection in a compact package.
Typically found on pto shafts, clatter clutches are the ones which rasp like a chain gun when resistance down the driveline pushes them past a pre-set limit – usually making enough racket to wake even a semi-comatose operator.
The strip/rebuild story is the same for all Walterscheid pin clutches, and is similar for Italian Bondioli and Pavesi units.
Both trap internal steel plungers under substantial spring pressure, which is why safe dismantling involves the creative use of plastic bags: Please read the “Safety” tab before starting work.
Time-saving special tools can be bought, though the job can be done easily with basic kit found in most farm workshops.
 |
|
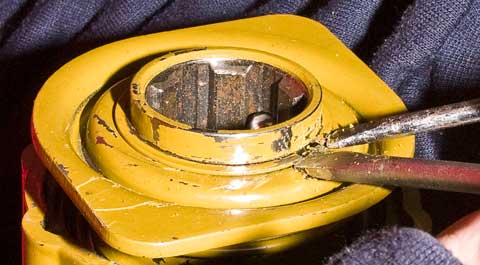
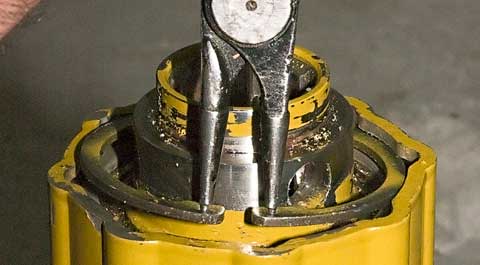
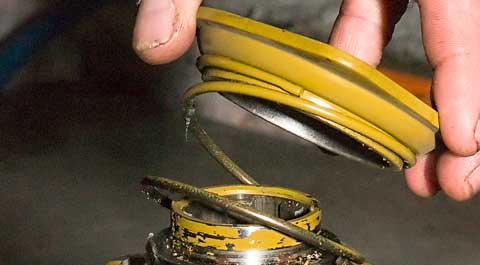
Most Walterscheid pin clutches use a spring-loaded quick release collar, as here. Start strip down by taking off the collar-holding snap ring; like all of the breed it’s awkward. Use two screwdrivers to prise the ends apart, or grind flat tips on some old external circlip pliers. Caution: the snap ring may ping off, and the collar below it is under modest spring pressure. Lift away the collar and spring, extract the three large balls from their housing. |
2. Internal circlip
 |
|
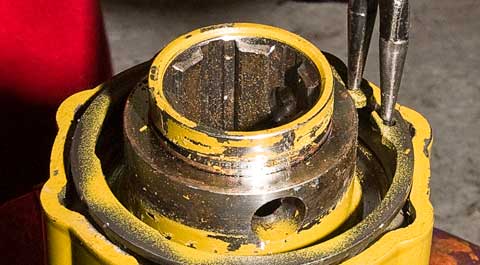
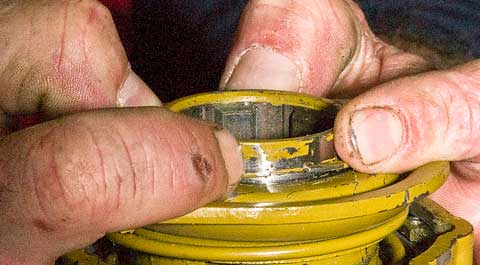
Take out the big internal circlip. |
3. Steel spacer
 |
|
Fish out a steel spacer and nylon seal. |
4. Put clutch in bags
 |
|
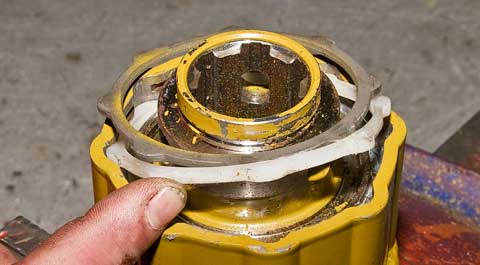
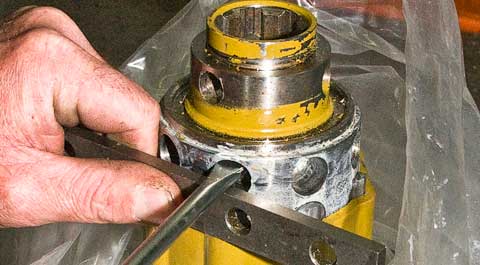
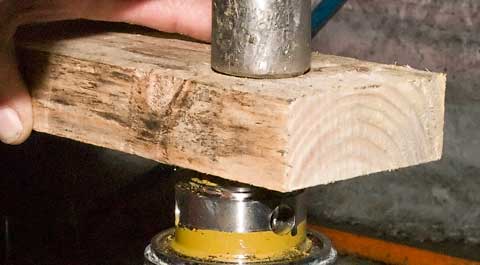
Rustle up a pair of plastic bags. Put one inside the other, then sit the clutch inside them to surround it with a double thickness of plastic. Clamp the whole thing in the vice. If you’re lucky and the clutch drum has an opening on the yoke side, start to tap the inner hub up from below. But more likely you’ll have to use a screwdriver and support block to lever the hub up a little from the top, as shown. |
Stop as soon as you see the edge of the first ring of plungers. Then pull up the bags so the whole clutch is inside them before proceeding.
5. Continue levering
 |
|
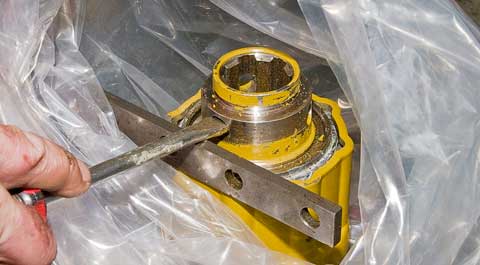
Continue levering until the first ring of plungers fires into the bags, then carry on ring-by-ring to snare each remaining set in plastic. Degrease all bits for inspection. |
 |
|
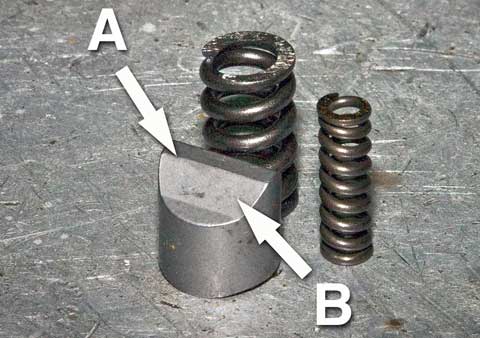
The outer clutch drum is made of hard steel and is unlikely to wear. The inner hub is softer, but, as it should never touch the drum, is also likely to be intact. Which leaves just the plungers and springs (above). Springs break and plungers can round off at the shoulders (A) or wear through on their flanks (B). Walterscheid’s Agraset 106 repair pack holds eight new plungers and spring pairs – enough for one hub row. |
 |
|
Sort out the required number of new plungers and springs – see “Balance” tab. Lightly grease inside the drum, the hub and all plungers/springs. Walterscheid specifies Agraset 116 white lithium grease, but good quality normal grease will do. Decide the number of plungers and springs needed in each row, then fill the first of them – in this case it’s a full house. Align the plungers so their tips can slide into the outer drum’s grooves. |
8. Force plungers back
 |
|
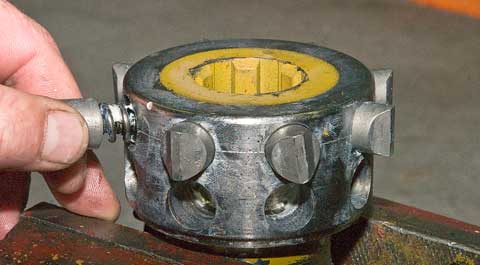
Use a hose clip to force the plungers back into their bores, taking care to compress the ring evenly. Keep the clip level. |
9. Line up
 |
|
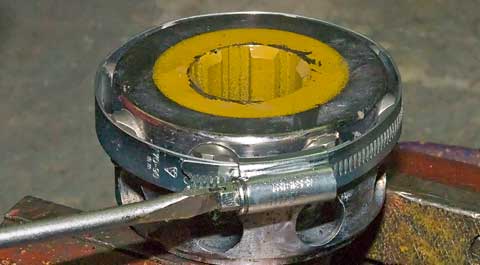
Sit the hub over the drum so plungers and grooves line up, then gently tap the hub until the first row of plungers slides safely inside the drum. Load the next hub row with spring and plungers, compress them with the clip and repeat. |
10. Seal and spacer
 |
|
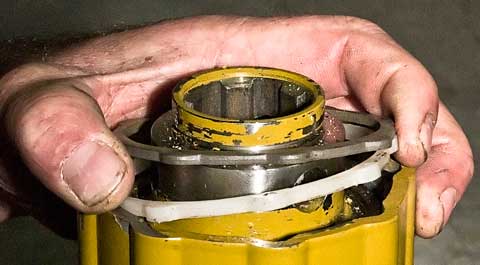
With the hub fully home, drop in the nylon seal and spacer. |
11. Secure hub
 |
|
Secure the hub with its circlip. |
12. Grease ball seats
 |
|
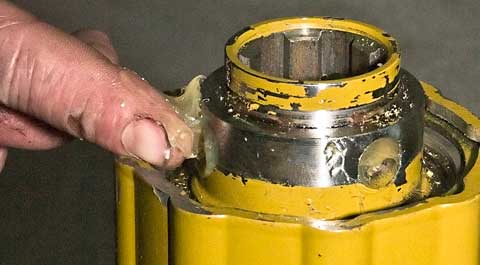
Grease the collar’s ball seats. |
13. Spring and collar
 |
|
Add the spring and collar. |
14. Snap ring
 |
|
Finish with the collar-retaining snap ring. |
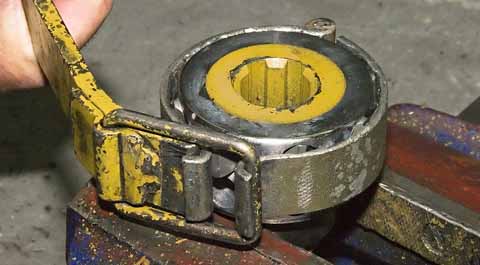
Walterscheid offers a hub extractor (A, part SW 24) and a spring compressor (B, part SW 04) to ease pin clutch repair. But as these cost upwards of £100 each they make sense only where a volume of work is likely.
One-off rebuilds can be handled easily with common workshop tools – a vice, screwdrivers, circlip pliers, one or more Jubilee clips, a wood block or a soft-faced hammer.
Catch and count all the old plungers and springs. The refurbished clutch must have exactly the same number of each as before, or its torque-handling capacity will change.
Too few plungers and/or springs means it’ll slip too readily in work; too many plungers and/or springs and it won’t slip enough, risking damage to components further down the driveline.
It may be that to arrive at the right toque capacity, the clutch was made with fewer plungers than there are holes in the hub, and perhaps double springs behind some plungers to pinpoint a setting.
To get the rebuild right, just distribute the new plungers and springs evenly across the available hub holes.
For example, each row on a Walterscheid hub always has eight holes. So the two-ring clutch used for this article has 16 holes. If it happened to come with only eight plungers, put four in each row and spread them evenly around the circle, so when you look at the hub from above the plungers are spaced equally.
The same goes for springs. If the clutch originally had eight big springs, but only four small inner ones, sprinkle the inner ones evenly between the plungers. The idea is always to balance load across the clutch.
Walterscheid’s pin clutch range fall broadly into families. Torque capacity is set by the number of plungers and springs in the clutch. Housing and hub diameters are identical within a family, pins and springs are the same across the range.
The hub carries up to six rows of eight holes each, with torque capacity (and unit length) rising with row number. Depending on the profile of the housing, some clutches can be driven in either direction, others only in one direction.
Over-run or freewheel clutches look similar to pin clutches, but do a completely different job. Intended for implements whose rotating bits have a lot of inertia (for example a flail topper), they protect the implement/tractor driveline by letting the driven machine slow down at its own speed once the tractor’s pto is shut off.
Over-run clutches always have a smooth outer housing and should turn freely in one direction, whereas most (but not all) pin clutches housings are corrugated and the internals should never turn freely.
It follows that you can’t blithely swap one driveline clutch for another, even if the two look identical.
Radial pin clutches contain steel plungers under considerable spring pressure. As the drum and inner hub are separated, the plungers will spit out like bullets.
Therefore it is essential to dismantle the clutch inside a bag, both to keep yourself from harm and to keep hold of all the bits – picture four shows a good way to do it. And when taking off circlips, safety specs are a sensible precaution.
