
How to dissect chickens to detect disease
 © Tim Scrivener
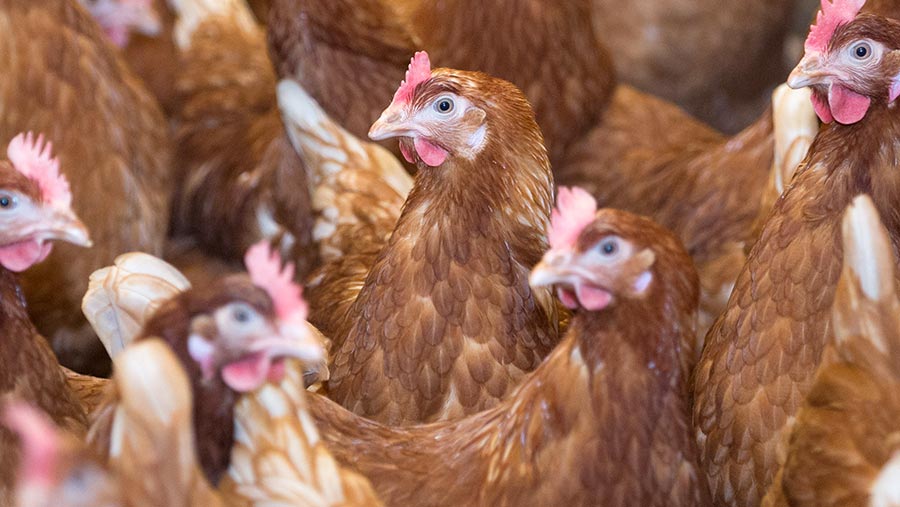
 Learning how to dissect a chicken can be important skill for poultry producers, particularly if there is sudden or unexplained death in the flock. Ruth Wills attended a course with Mount Vets to find out more.
Post-mortems to detect disease can only be carried out by a vet, but producers can learn how to dissect a bird carcass to help them identify common indications.
Some diseases can be seen easily on just opening the bird; for example, blackhead is obvious from hobnail black spots on the liver.
Other diseases might require further investigation, in which case swabs need to be taken from different organs. Stuart Young, director at Mount Vets, explains the process of dissecting and examining a bird carcass.
See also: How to prevent keel bone damage in poultry layers
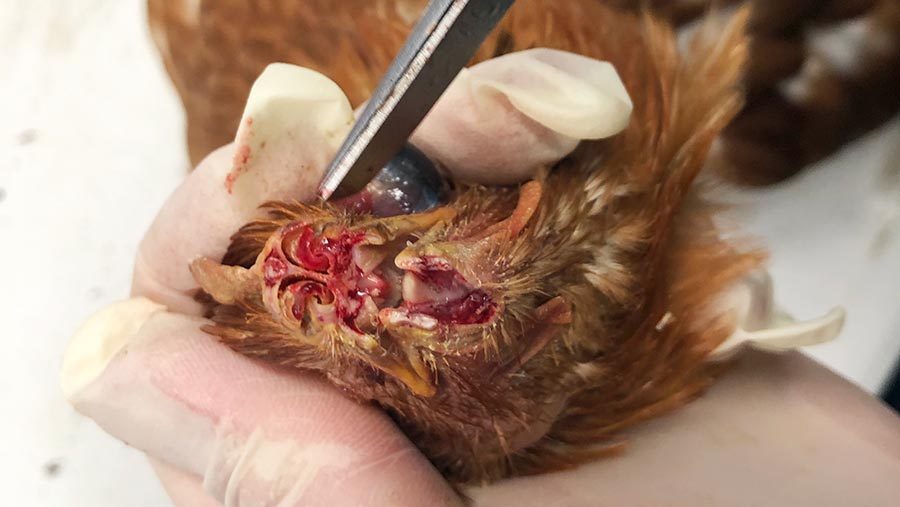
1. Cut across the nostrils
© Ruth Wills/ Agri Hub
Cut across the nostrils to reveal the sinuses. The sinuses lead back towards the eyes and here you may find signs of Mycoplasma gallisepticum, which causes nasal discharge.
Problems in the nasal passages can be caused by the environment in which the birds are kept. When there is dust and ammonia the sinuses block up with dust and mucus – squeeze the sinuses to see if mucus is excreted.
2. Open the mouth and neck
Cut down the side of the jaw and down the neck, then when at the bottom of the neck put your thumb in and skin the bird to reveal the trachea.
Look at the cleft on the roof of the mouth; air comes from the nostrils through the cleft and into the windpipe, run your thumb over that area and you may find a big lump of mucus.
If it is a green, snotty colour then it is likely the bird has been breathing in ammonia or dust, or it could indicate a respiratory disease.
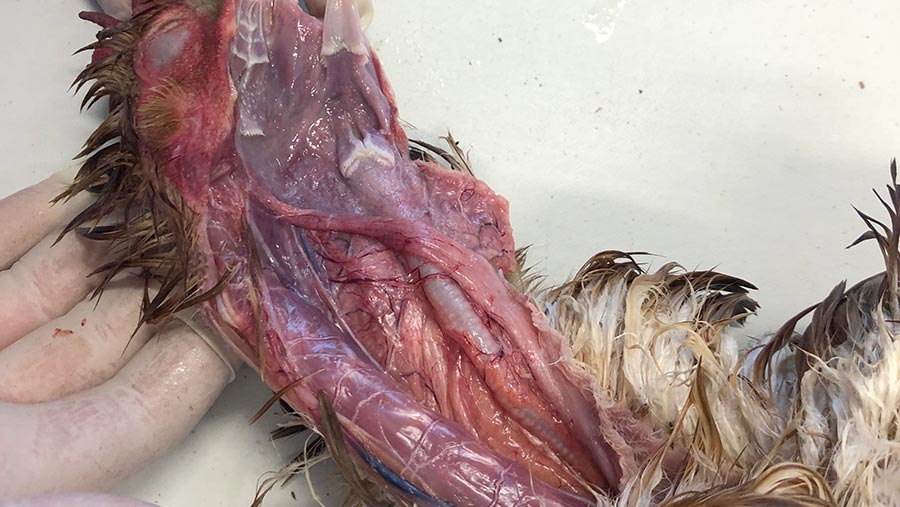
3. Open the windpipe
© Ruth Wills/Agri Hub
Put the scissors into the trachea and make an incision all the way down. The windpipe is lined with cilia (small hairlike projections) and is where gapeworms can be found, as well as Infectious laryngo tracheitis (ILT).
ILT is very common in backyard flocks and completely strips the trachea of cilia, filling it with blood and debris. However, all commercial birds are vaccinated in-rear for the disease. If there is mucus, then the birds could be breathing in ammonia or dust, or it could represent a viral challenge.
4. Feet
Check the feet for signs of inflammation and pododermatitis (ulcers on the bottom of the feet). This potentially indicates poor litter conditions.
5. Vent
© Ruth Wills/Agri Hub
Find the vent and look for signs of pecking or diarrhoea. Feather score the bird, look for signs that the tail and the preen gland have been chewed and white feathers pulled through.
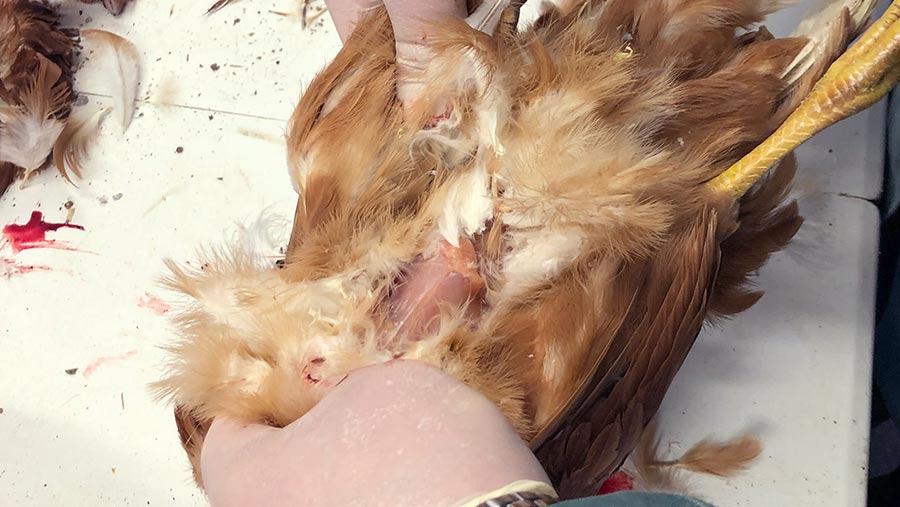
6. Keelbone
© Ruth Wills/Agri Bub
Turn the bird on its back and feel for the keel bone, which could be fractured. Feel the end of the keel bone until it tapers to a point and cut across the skin for 2cm, just above the keelbone.
Then skin the bird. Put your thumb under the skin and holding one leg, skin the bird both sides. Push the feathers away and reveal the body of the bird. Dislocate the hips by bringing the hip bone up and back on itself, here you can check the hips for damage.
7. Crop
On the breast of the bird is the crop, which stores and breaks down food. Make an incision and see what the bird has eaten. If there are feathers there could be a pecking problem. A knotted rope of grass can indicate that birds have gorged on grass, which has become impacted.
8. Breast muscle

© Ruth Wills/Agri Hub
The breast muscle may be different colours. Deep red signals an infection that has caused the bird to overheat. If it feels tacky to touch and the comb (on top of the bird’s head) is also quite black, that can indicate dehydration or septicaemia.
If there are pink and white areas, there is diffusion of the blood, which means the bird could have had problems with breathing or died as a result of a smother.
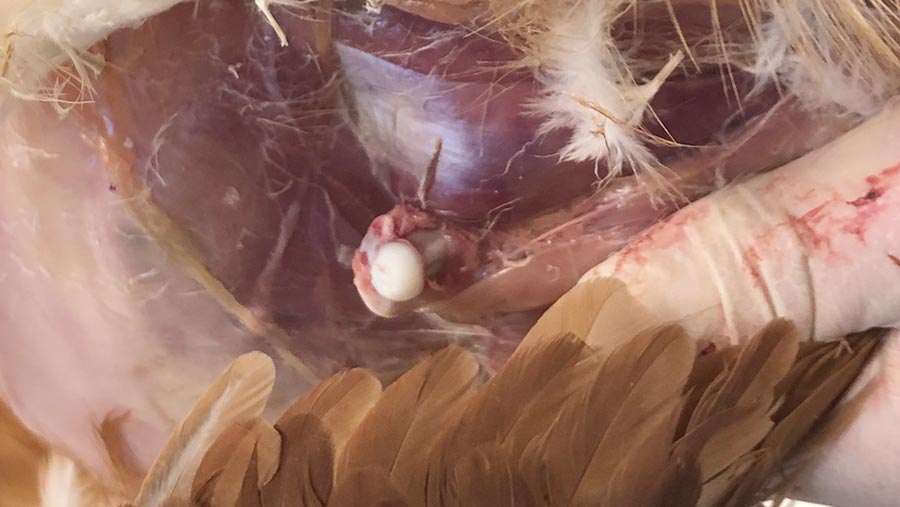
9. Open the abdomen
Make an incision a couple of centimetres long at the back of the keelbone into the abdomen, then put the scissors at 45deg towards the neck and cut through the both sides of the rib cage. Put your thumb under the keelbone and gently pull until it snaps back, now you will have access to the heart.
10. Heart
© Ruth Wills/Agri Hub
Pick the heart up and cut beneath it until it comes out. It should be in a bag called a pericardium, which should not stick to the heart – this can be a symptom of E coli.
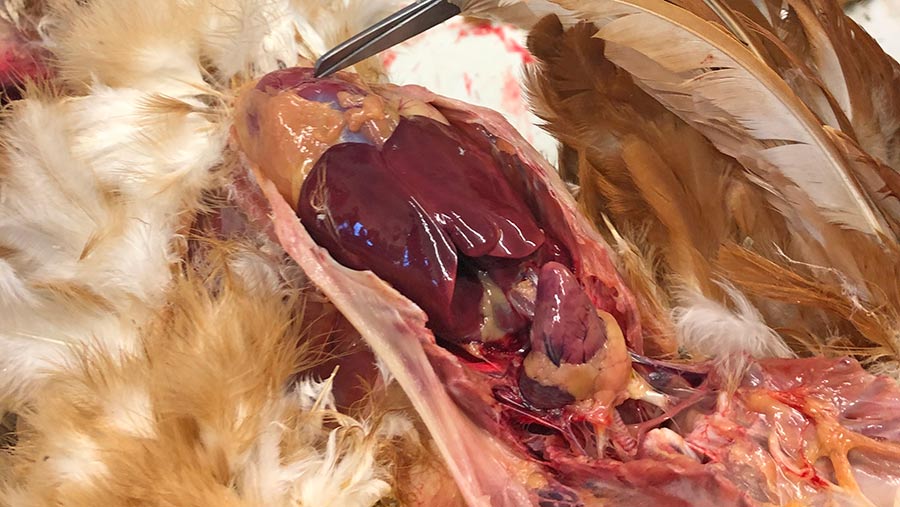
11. Liver
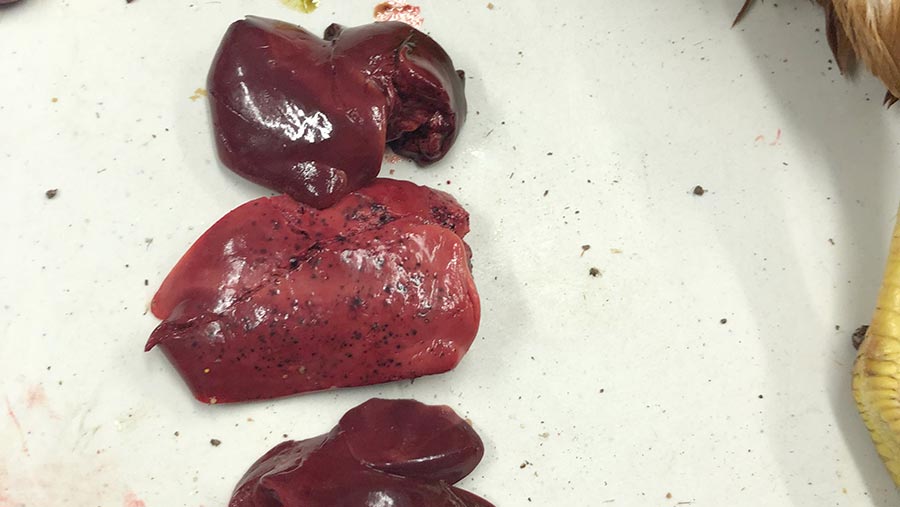
© Ruth Wills/Agri Hub
A normal liver has sharp edges and is quite firm. A spotty liver has very fine small white spots, and blackhead produces big hobnail spots. If the liver is mushy that means it has been working too hard under infection.
12. Lungs
The lungs are embedded against the rib cage and are very light and spongy. The bird also has eight pairs of air sacs separate from the lungs.
Mycoplasma gallisepticum can affect these, causing airsacculitis where mucus can be seen in the air sacs, making it uncomfortable for the bird to breathe.
Pneumonia is an infection of the lungs; instead of being pink and light they are dark and heavy and contain fluid. Haemorrhages on the heart, thick lungs and sudden death can also be symptoms of pneumonia.
13. Spleen
The spleen is a little button, which stores red blood cells and is a part of the immune system. It can be a site of Marek’s disease, or erysipelas, which causes the spleen to double in size.
14. Intestines and gizzard
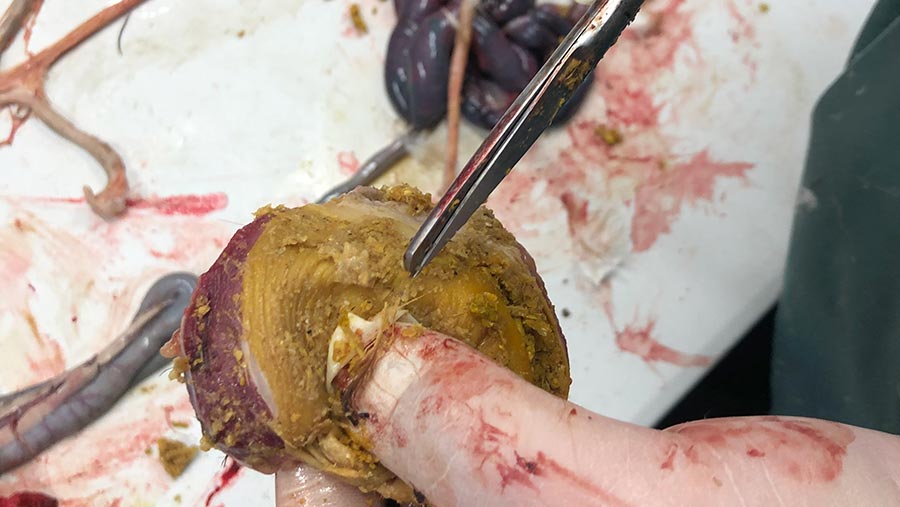
© Ruth Wills/Agri Hub
The proventriculus has a sausage-like appearance and is found in front of the gizzard. Cut that off and pull the intestines out.
Cut up to the gizzard, to see if there is normal food in there – a lot of litter suggests the birds have been unable to access feed. Peel the yellow coating off the gizzard; if the gizzard is red and damaged that is gizzard erosion, causing the muscle underneath to become inflamed and sore.
If there is egg material all over the intestines, it indicates egg peritonitis – the egg gets released into the abdomen instead of the oviduct.
15. Duodenum and pancreas
The U-shaped organ next to the gizzard is the duodenum and next to that is the pancreas. Inflammation of the gut can make blood vessels become very pronounced and thickened. Cut down the length of the intestine and check for worms.
A twisted gut is obvious by its swollen, twisted nature and can be full of blood and gunge.
16. Caecum
The Y-shaped part of the caudal intestine is where bacterial digestion of food and some water reabsorption take place. In a normal bird the contents should resemble French mustard, but when there is infection, they can be very loose or yellow and frothy. This is very common in brachyspira, but could be an indicator of digestive upset.
Blood in the caecum can be a sign of coccidiosis, which is more common in younger birds. The caecum can also hold a smelly white infection associated with blackhead and liver lesions.
There may be small hairlike heterakis worms, which could be part of a blackhead infection, but are non-pathogenic in most cases.
17. Ovary and oviduct
In the normal laying bird, there is one functional ovary with big yellow follicles of differing sizes which are released into the oviduct. The egg is formed during its passage down the oviduct – this process takes just over 24 hours to produce a normal egg.
Certain infections can cause abnormal eggs – infectious bronchitis (IB) produces pale and sometimes wrinkled shells because the virus attacks the oviduct directly. Pale yolks can be a sign of parasitism, nutritional problems and other infections.
18. Kidneys
Two kidneys are found beneath the oviduct and intestine, very snug to the back of the bird. They are long, thin and brown in colour.
Birds do not produce urine but excrete nitrogenous waste in the form of the white cap found on the faeces called urates. Kidney infections are quite common and there is often a swelling of the kidneys with white infiltration of urates.
In severe kidney infection these urates spread across the whole body as visceral gout, giving a white icing sugar appearance on liver, heart and other organs. Kidney infections can also occur due to certain IB strains.
19. Cloaca
This is the shared exit of faeces and egg and a common site for pecking, which should be thoroughly examined. Sometimes you’ll find the cloaca is stained with blood and has a very large opening which could indicate cannibalism.
Upon opening the abdomen, you may see the intestine missing and a large blood clot in its place, this is evidence the bird has been pecked out alive. No large blood clot indicates the intestines could have been pecked out after the bird has died.